As I have been thinking about Christmassy things recently, I thought I would show you this Crazy Patchwork Christmas Tree again. It was made using using fabric from Abakhan. If you fancy having a go at making one, read on for the tutorial.
Crazy Patchwork Christmas Tree
Materials
- An assortment of Christmas fabric scraps
- A piece of plain fabric for the bucker [I used green]
- Plain fabric for base to sew patchwork onto [this could be a piece of old curtain lining or sheeting]
- 2oz wadding
- Fabric for backing [I used plain red]
- Brass ring or ribbon for hanging loop
- Thread
- Rotary cutter
- Self-healing cutting mat
- Ruler
- Marker pencil for fabric
- Scissors
- Stitch unpicker [I needed mine several times!]
1. With your base fabric and using your ruler on the cutting mat, cut a rectangle – this piece will be used to make the triangle for your tree. The tree can be made to whatever size you wish, although I found it difficult to be sure what the exact finished size would be. My rectangle measured 13” x 11”. The finished patchwork section measured 11.5” x 10”.
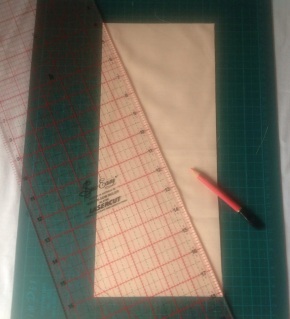
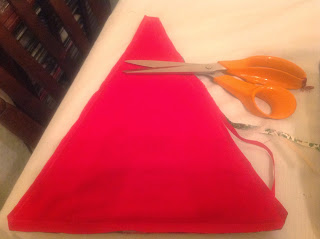
2. To create a triangle, fold the rectangle in half along its longer sides. Place it on your cutting mat with the fold going from top to bottom. Place your ruler on the fabric beginning with its edge at the top of the fabric fold and angled out towards the long cut edge of your base fabric, leaving 0.5” between the ruler and the cut edge of the fabric.
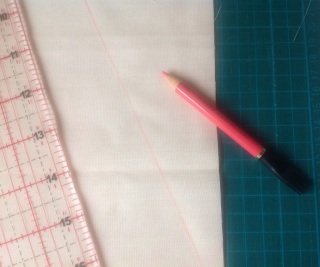
3. Using your marker pencil, draw a line along the edge of the ruler. This pencil line is a useful indicator when sewing the patchwork to ensure that the entire surface of your tree is covered.
4. Slide the ruler across the fabric to leave a half inch strip between your drawn line and the edge of the ruler. Using the rotary cutter, cut the fabric. You now have your triangle on which to sew the patchwork.
5. Open the triangle and lay flat with the pencil line showing. Mark a similar line, half an inch in from the second long side of the triangle.
6. Using the template attached to these instructions, cut one piece of green fabric, one piece of red fabric and one piece of wadding to make the bucket. The hatched areas are the seam allowances. The cross-hatched areas will be hidden when the tree is completed.
7. Sandwich the three layers together: wadding at the bottom, then red fabric and topped with green fabric.
8. Stitch together as shown in the photograph. Trim the bottom edge and bottom corners.
9. Turn the bucket right sides out.
10. At this point I decorated my bucket with a pre-programmed decorative holly stitch on my sewing machine.
11. Begin sewing pieces of Christmas fabric to the base. The method I used was ‘stitch and flip’ – see instructions below.
12. Take a piece of fabric and place in the middle of the triangle, right side facing up. You may sew this in place if you find it easier, using a fairly long straight stitch on your machine.
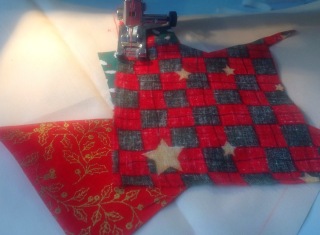
13. Take your second piece of fabric and lay it, face down, with one of its edges along one of the edges of your first piece. Stitch in place using a long straight stitch. You may trim the fabric once it has been attached.
14. With your third piece of fabric and working around the first piece, attach it along the second edge of the first piece, ensuring no fabric edges are left showing.
 |
| Sewing it the wrong way! |
**I made my first mistake here, attaching the wrong side of the third piece of fabric to the edge of the first piece! Hence the need for the stitch unpicker!
| Sewing it correctly this time! |
15. Continue the process of sewing on scraps as shown in the photos, working around your patchwork rather than concentrating on one area. If you are unhappy with how it looks just unpick it and try another piece.
16. Note: When working towards the top of the tree, I found that I had to unpick and reattach several pieces as I had miscalculated what they would cover. If this happens to you, don’t panic, unpicking does not show on the finished item!
17. When all pieces have been stitched in place, stitch along all joins using a decorative stitch – I used a zigzag stitch 5mm wide and 3mm long in red thread.
18. Press the tree and the bucket firmly
19. Using your patchwork as a template, cut the backing fabric and a piece of wadding.
20. Pin the three layers of the tree together with the right sides of the fabrics facing each other and the wadding at the bottom.
21. Insert the bucket between the two right sides of the tree fabric, with [i] the front of the bucket facing the right side of the tree, [ii] the widest end of the bucket [i.e. the top] lined up with the base of the tree, and [iii] the narrowest end [i.e. the bottom] pointing towards the top of the tree. [* The bucket must be inside the sandwich, not on the outside!]
22. Pin the bucket firmly in place.
 |
| The two blue pins inside the triangle are securing the bucket |
23. If you would like a ribbon hanging loop, insert the ribbon at this stage, between the patchwork and the red fabric, at the point of the tree, pointing down towards the bottom of the tree. [* The loop must be inside the sandwich, not on the outside!]
24. Pin the ribbon firmly into place.
25. Stitch the layers together, leaving a gap of about 3” along one of the sides.
26. Trim the seams and corners.
27. Turn the tree the right side out, taking care to neaten each of the points. Press.
28. Neatly slip stitch the gap closed.
29. If you are using a ring to hang the tree, stitch it firmly into place on the back of the tree, near the top point, making sure that it is not visible from the front.
At this point I also tied the three layers of the tree together with knots spaced
evenly, but widely across the back, to keep the tree looking neat.
 |
| The finished tree |
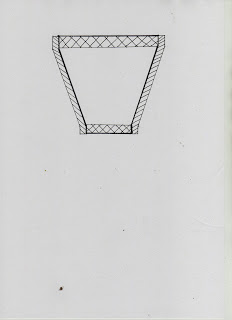 |
| Template for bucket |








Another blinding tutorial Dina, thank you x
LikeLike
You're very welcome, Anne.
LikeLike