I Just Felt Like It – Tutorial for making felt on an embellisher

Felt and some of the raw materials

I have been thinking of how and where to keep the lovely postcards I received from members of the Be Creative group. I couldn’t decide whether I wanted to put them in a book or a box but, I think, I would probably prefer them to be in a box. Hmm. Next problem: how to construct it. I didn’t have a box the right size and I still didn’t have a sewing machine so that restricted some of my options. Anyway, I thought I would start by making some felt on my Janome embellishing machine.

I don’t use my embellisher very often. It’s not because I don’t like it (I love it!) but because I tend to have lots of ‘stuff’ out when I use it which I don’t like to leave lying around as it looks so messy and I know Peter dislikes mess and untidiness. (I haven’t yet figured out how he copes with me and my “put it where I can see it” ways!)

So, whilst Peter was out at an appointment the other day, out came the embellisher, along with just a little ‘stuff’. Although it is possible to make felt with the machine using just wool tops, I decided to use some denim for backing to give it a little more thickness or strength.


Embellishing machine, wool tops
and pot of yarn scraps


This is how I made my embellished felt.

You will need:
Denim
Wool tops
Cling film or net fabric
Yarn or fabric scraps for embellishment
Embellishing machine or needle felting tool

1.     If you are using old jeans, cut the legs off the jeans and set aside the denim shorts that are left, either to wear or for another project.

2.     Cut off seams and hems from the legs. Put those aside and keep for use in another project.

3.     Take some wool tops, between about 15 to 25 cms in length.

4.     If you are right-handed, hold the wool tops in your left hand and gently pull some fibres from the length with your right hand.

5.     Lay the wool fibres on the denim. I laid the fibres north to south and filled in some spaces by putting them east to west. Repeat until an area of the denim is covered which can then be covered by a piece of cling film.

6.     Place the denim/wool tops/cling film sandwich under the needles of the embellisher, cling film uppermost. Place your hands on the sandwich, about 7 to 10 cms either side of the needles and apply enough pressure to hold the cling film gently but firmly in place.

7.     Depress the foot pedal so that the needles are punching into the sandwich at a regular speed. Using the pressure of your hands, move the sandwich of fibres slowly around so that all areas are punched by the needles. Once the fibres have begun to felt into the denim, remove the cling film and continue the felting process. Do not overwork the felt at this stage.

8.     Repeat steps 6. and 7. until the the entire piece of denim is covered with wool tops.

9.     Sprinkle scraps of yarn and/fabric across your part-felted fibres.

10.    Gently pull off small amounts of the wool tops and spread very thinly across the scraps on your felt. This will help the scraps to felt into the main piece.

11.    Begin the machine felting again slowly, in the same manner as before, gently gathering speed. Remove the cling film when the scraps have begun to be secured into the felt.

12.    Increase speed of needles and continue felting until all scraps are securely in the felt.

13.    Remove your felt from the machine as it is now ready to use.


These are the two pieces of felt that
I made


I used two legs from jeans and made pieces of felt, as you can see above. I used different scraps for each. For the first I used yarn scraps and this was the result:

Felt made with a denim backing, wool
tops and yarn scraps

The second piece I made using another leg from a pair of denim jeans, wool tops and scraps of vegetarian silk thread. You can see the different appearance from the first piece.

Felt made using denim for the backing, wool
tops and scraps of vegetarian silk thread


I haven’t made the box yet for reasons that will become clear in a subsequent post!


Tutorial for Crazy Patchwork Christmas Tree Hanging


As I have been thinking about Christmassy things recently, I thought I would show you this Crazy Patchwork Christmas Tree again. It was made using using fabric from Abakhan. If you fancy having a go at making one, read on for the tutorial.

Crazy Patchwork Christmas Tree


Materials

  • An assortment of Christmas fabric scraps
  • A piece of plain fabric for the bucker [I used green]
  • Plain fabric for base to sew patchwork onto [this could be a piece of old curtain lining or sheeting]
  • 2oz wadding
  • Fabric for backing [I used plain red]
  • Brass ring or ribbon for hanging loop
  • Thread
  • Rotary cutter
  • Self-healing cutting mat
  • Ruler
  • Marker pencil for fabric
  • Scissors
  • Stitch unpicker [I needed mine several times!]


1.            With your base fabric and using your ruler on the cutting mat, cut a rectangle – this piece will be used to make the triangle for your tree. The tree can be made to whatever size you wish, although I found it difficult to be sure what the exact finished size would be. My rectangle measured 13” x 11”. The finished patchwork section measured 11.5” x 10”.


2.            To create a triangle, fold the rectangle in half along its longer sides. Place it on your cutting mat with the fold going from top to bottom. Place your ruler on the fabric beginning with its edge at the top of the fabric fold and angled out towards the long cut edge of your base fabric, leaving 0.5” between the ruler and the cut edge of the fabric.


3.            Using your marker pencil, draw a line along the edge of the ruler. This pencil line is a useful indicator when sewing the patchwork to ensure that the entire surface of your tree is covered.


4.            Slide the ruler across the fabric to leave a half inch strip between your drawn line and the edge of the ruler. Using the rotary cutter, cut the fabric. You now have your triangle on which to sew the patchwork.


5.            Open the triangle and lay flat with the pencil line showing. Mark a similar line, half an inch in from the second long side of the triangle.


6.            Using the template attached to these instructions, cut one piece of green fabric, one piece of red fabric and one piece of wadding to make the bucket. The hatched areas are the seam allowances. The cross-hatched areas will be hidden when the tree is completed.


7.            Sandwich the three layers together: wadding at the bottom, then red fabric and topped with green fabric.

8.            Stitch together as shown in the photograph. Trim the bottom edge and bottom corners.


9.            Turn the bucket right sides out.


10.       At this point I decorated my bucket with a pre-programmed decorative holly stitch on my sewing machine.


11.       Begin sewing pieces of Christmas fabric to the base. The method I used was ‘stitch and flip’ – see instructions below.

12.       Take a piece of fabric and place in the middle of the triangle, right side facing up. You may sew this in place if you find it easier, using a fairly long straight stitch on your machine.


13.       Take your second piece of fabric and lay it, face down, with one of its edges along one of the edges of your first piece. Stitch in place using a long straight stitch. You may trim the fabric once it has been attached.


14.       With your third piece of fabric and working around the first piece, attach it along the second edge of the first piece, ensuring no fabric edges are left showing.

Sewing it the wrong way!
        **I made my first mistake here, attaching the wrong side of the third piece of fabric to the edge of the first piece! Hence the need for the stitch unpicker!

 Sewing it correctly this time!

15.       Continue the process of sewing on scraps as shown in the photos, working around your patchwork rather than concentrating on one area. If you are unhappy with how it looks just unpick it and try another piece.


16.       Note: When working towards the top of the tree, I found that I had to unpick and reattach several pieces as I had miscalculated what they would cover. If this happens to you, don’t panic, unpicking does not show on the finished item!


17.       When all pieces have been stitched in place, stitch along all joins using a decorative stitch – I used a zigzag stitch 5mm wide and 3mm long in red thread.


18.       Press the tree and the bucket firmly
19.       Using your patchwork as a template, cut the backing fabric and a piece of wadding.


20.       Pin the three layers of the tree together with the right sides of the fabrics facing each other and the wadding at the bottom.


21.       Insert the bucket between the two right sides of the tree fabric, with [i] the front of the bucket facing the right side of the tree, [ii] the widest end of the bucket [i.e. the top] lined up with the base of the tree, and [iii] the narrowest end [i.e. the bottom] pointing towards the top of the tree. [* The bucket must be inside the sandwich, not on the outside!]
22.       Pin the bucket firmly in place.
The two blue pins inside the
triangle are securing the bucket
23.       If you would like a ribbon hanging loop, insert the ribbon at this stage, between the patchwork and the red fabric, at the point of the tree, pointing down towards the bottom of the tree. [* The loop must be inside the sandwich, not on the outside!]


24.       Pin the ribbon firmly into place.


25.       Stitch the layers together, leaving a gap of about 3” along one of the sides.


26.       Trim the seams and corners.

27.       Turn the tree the right side out, taking care to neaten each of the points. Press.

28.       Neatly slip stitch the gap closed.


29.       If you are using a ring to hang the tree, stitch it firmly into place on the back of the tree, near the top point, making sure that it is not visible from the front.

         At this point I also tied the three layers of the tree together with knots spaced
         evenly, but widely across the back, to keep the tree looking neat.


The finished tree


Template for bucket

No-Sew Christmas Napkin Ring

No-Sew Decorative Christmas Napkin Ring


Materials
1 x 9” square piece of red felt
1 x 9” square piece of green felt
Paper-cutting scissors
Fabric scissors
Marker pen
Template sheet
Instructions
Print the template onto card.
Using your paper-cutting scissors, cut out each of the shapes from the card template sheet, including the centre circle on the leaf and petal pieces.
Use paper-cutting scissors to cut out templates

The cut-out templates. Note that the centre
circles have been cut out
Place the spiky leaf shape onto the piece of green felt. Draw around it carefully with the marker pen. Make sure you have marked the centre circle.
Ready to draw around template
Ready to cut out template
Cut the shape, including the centre circle, out of the green felt. 
Cut out the template
**Tip** Cut a rough square out of the felt around the leaf shape as it will make it much easier to cut out the detailed shape.
**Tip** Roughly cut out a square of felt to make
cutting the details easier
Place the green felt leaf shape to one side.
Note the centre circle has been cut out.
Take the sheet of red felt. Place the petal shape at the corner of the sheet and the long shape along the opposite edge of the felt, as shown in the picture. 
Ready to draw the first two shapes
Draw around both shapes with the marker pen, including the centre circle of the petal shape. Move the petal shape along the piece of felt towards the long shape. Place it so that it does not overlap either of the shapes you have already drawn. Draw around the petal shape for a second time, including the centre circle.
Cut the three shapes out of the red felt, remembering also to cut out the centre circle pieces.
**Remember the tip mentioned above.**
The three red pieces have been cut out
Gather your four cut felt shapes.
Long red piece of felt and spiky green piece
Take the long red shape and the green spiky leaf shape as shown in the photograph above.
Pushing and pulling the ball-shaped end through
the centre circle gently
Push one rounded end of the long shape through the centre hole of the spiky leaf shape.
One ball-shaped end has been pushed
through the centre circle
Take one red petal shape.
The first red petal shape is ready
to be attached
Take the rounded end of the long shape that you have already pushed through the centre of the leaf shape and push it through the centre of the red petal shape.
The first ball-shaped end of the band
is going through the centre circle
This is how the ball-shaped end will
look
Take the other rounded end of the long piece of felt.
The other end of the long red shape
is ready 
Push it through the centre hole of the green leaf shape.
Manoeuvre the felt gently
Then push it through the centre hole of the red petal shape.
It has gone through the centre of the green shape
Take the second red petal shape. Place it on top of the partly constructed napkin ring.
The second red petal shape is ready to
be attached
Push one ball-shaped end of the long shape through the centre hole.

One end has been passed through the
circle
Push the other ball-shaped end of the long shape through the same centre hole.
Both ends are through all layers
Gently neaten the two ball-shaped ends.
Gently neatening the end pieces
Gently move the leaf shape and each of the two petal shapes to make an attractive finished item.
Moving leaves and petals into positions
Your napkin ring is ready for use.
Beautifully arranged leaves and petals
The napkin ring in use
Embellish as desired, for example, do some hand stitching on the petals, stick glitter or beads onto the ball-shaped ends.
An alternative is to use green felt for the band. This picture shows the result of doing so.
Napkin ring using green felt band


TEMPLATE SHEET


Manipulated Fabric Christmas Tree

It’s that time of year again when crafters’ minds are concentrating on Christmas and all the goodies they can make for family and friends, as well as for themselves, or even for sale.


The tutorial I created for the Folded Fabric Christmas Tree proved so popular that I have decided to repost it. it will save anyone having to trawl through my old post to find it! [That’s my good deed for the day!]

I still haven’t figured out how to include a link to a .pdf file so, if you want a printed copy, I’m afraid you will have to copy and paste it all. Apologies but I am not able to deal with requests for a .pdf file for the foreseeable future.

Have fun making the tree and I hope you will send me pictures if you do make one.

Manipulated Fabric Christmas Tree


Materials required:

  • Two different designs of Christmas fabric (I have used a red design and a green design and will refer to these throughout.)
  • Cotton thread in complementary colour(s)
  • Scraps of brown felt and red felt
  • Beads for embellishment (if desired)
  • Rotary cutter
  • Quilter’s ruler
  • 60° triangle template
  • Pins
  • Hand sewing needle
  • Beading needle
  • Fabric glue
Tools and materials needed to make a
Manipulated Fabric Christmas Tree
Additional items required to make the tree

Trim the ends of each piece of Christmas design fabric to ensure they are straight.

Creating a straight edge on fabric

Cut a strip of fabric measuring 33” x 6” from the green fabric and from the red fabric.

Measuring and cutting fabric strip
Using your 60° triangle template or, alternatively, the 60° line on your quilting ruler, cut ten triangles measuring 6” on all three sides from each strip.
Measuring triangles
Cutting triangles from fabric
Cutting fabric using rulers and
rotary cutter
You will now have 10 red 60° triangles and 10 green 60° triangles, all with sides measuring 6”. This photograph shows ten pairs as I cut double thickness.
Red and green fabric triangles ready
for folding
Place one red triangle and one green triangle right sides together. Pin them together as shown by the red triangle in the picture below.
Place one triangle of each colour together
with right sides facing

Stitch the triangles together, leaving a gap along one side of approx 2.5”, for turning.

Stitching triangles together
Leave a gap in the stitching for
turning
Snip off each of the points being careful not to cut your stitching.
Snipping the points off the
triangles
Turn the triangle so that the right sides are on the outside.
Turning the triangles inside out
Ensure points of triangle are neatly
turned

Press the triangle, making sure that the opening is neat and level.

Press the triangles

Neatly hand stitch the gap closed.

Hand stitch the gap closed
Repeat these steps for all the triangles. You will have 10 double-sided triangles.


Take one of the triangles and fold it in half so that you have a right-angled triangle with points 1 and 2 together.

Finger press the fold.
Fold in half into a right-angled triangle again so that points 2 and 3 are together.
Finger press the fold to find the centre of the triangle.

Finger press the fold
Fold one of the points so that it touches the centre of the triangle, where you have made your creases. Stitch in place.
Fold one point over to the centre of the
triangle

Likewise, fold and stitch the second and third points in place at the centre. This will create a hexagon shape.

Fold second point into centre
Repeat with third point

Turn the resulting hexagon over. Find the centre of one of the edges of the original triangle (rather than a new folded edge) and fold it in to the centre of the hexagon. Stitch in place.

Folding the first edge to the centre

Repeat the previous step with the other two original edges.

Fold second triangle edge to the centre
Repeat for third edge

You will now have a piece as shown in these two photographs below.

Front
Reverse
Make each of your triangles into this shape, making sure that you fold the fabric in the same way each time so that all finished triangles have the same fabric on the front.


**The two shapes below have been folded in the two different ways to show the contrasting end result.**
Triangles folded from front and from back

Now begin to construct your tree as follows:

Take two of your triangle shapes and place them side by side with one red fold on each lined up as shown in the picture below.
Place two triangles abutting at one corner edge

Place the triangles with right sides facing and stitch the red fold line firmly together.

Tutorial for Stitch triangles together firmly
Repeat this step to stitch all the triangles together to create the tree shape below.
Two rows of triangles stitched together
The reverse of the tree shape when all
triangles have been stitched together
Take your scraps of felt and pinking shears.

Cut a bucket shape from the dark brown felt, a tree trunk from the light brown felt and two decorative strips from the red felt, using the pinking shears.

Cut trunk and bucket shapes from felt
Stick the red decorations and the trunk onto the bucket.


Stick stripes onto bucket
Place trunk onto the back of the
centre of the bucket 
Secure trunk with PVA glue

To create the hanging loop, cut a strip of dark brown felt measuring 4” x 0.75”. 

Cut felt to make hanging loop
Fold it in half along its length then form a loop, as shown above.
Front view
Rear view
Stitch in place at the top of the tree.
Stitching hanging loop in place
When the glue has dried on the bucket, sew two lines of running stitch on each red stripe. (Sorry, the stitching does not show up very well.)
Stripes on bucket
Attach the trunk and bucket to the tree by stitching on the reverse.


Stitch trunk into position
The tree is now complete but you may wish to embellish it further.


The completed Christmas tree

I decorated my tree by threading four beads together and hanging them in each gap, as shown.

Stitching bead embellishments
to tree
Hanging bead detail
Hanging bead embellishments
on tree

Manipulated fabric Christmas tree complete
with bead decorations
** This tree was made using fabrics generously supplied by:


Very Easy Knitting Pattern For Chunky Scarf

The last few weeks have been very busy, with scarcely a minute to myself. I have travelled many miles, packed and unpacked many boxes and ended up exhausted – both mentally and physically. I arrived home at around 11.00pm yesterday and have done very little since then. Peter is usually pretty much incommunicado on Sundays so I knew there would be no complaints from him if I simply collapsed in a heap.

I have spent today doing very little apart from dozing, watching television and knitting. 

Easy knitting to nudge my ‘mojo’

I chose to knit as it is easy to do without having to think. As is usual at the moment, I was knitting for Syria. I had started another scarf before the mayhem began so I decided today to complete it. I cannot remember how I came about the lilac yarn that I was using – someone gave it to me, but I cannot remember who that was – but when I had offered it to others who were knitting for Syria, they didn’t want to use it. It is a fairly thick yarn, like a chunky, with an open twist to it.

Lilac open-twist chunky yarn

Although it looks as though it would be awkward to knit, in fact it is easy to work with. I have been using 6.5 mm (UK size 3, US size 10 1/2) needles and have been deliberately knitting loosely.

Easy pattern for a scarf


I have not used a printed pattern. This is how I make my easy chunky scarf:

Cast on some 20 stitches for an adult size or 14 for a child’s size.
Work four rows of garter stitch.
Next row: * In every stitch, wind the yarn round the needles once whilst making the knit stitch. Repeat to the end of the row.**
Next and every following row:  Repeat from * to ** until the scarf is the required length.
Work four rows in garter stitch. 
Cast off loosely. 
Weave in the ends.

Crocheted Baskets Workshop

At the start of our day

Yesterday, Anne (with an ‘e’) and I travelled to the Arts and Crafts Centre in Worden Park, near Leyland, Lancashire for a workshop with Shenna Swan. We were going to be learning how to make crocheted baskets, similar to those in the above photo.

Crocheting outside and enjoying
 the spring weather

Shenna had bought a parasol on Friday specifically for the workshop so that, if everyone was agreeable, we could sit out in the sunshine. As you can see, everyone did agree!

Some of the yarns that were
selected

Shenna began by showing us various examples of crocheted baskets and talked about ways in which they could be embellished, and handles or pockets added. Then came the chance to rummage amongst lots of lovely yarns. Shenna suggested that we use severals strands and colours of yarns to make our baskets. A crocheted basket needs to be fairly firm to make it functional as a basket so, in addition to several strands, the crochet hook that is used should produce a firm stitch. The yarns available ranged from very thin machine knitting yarns to some fairly thick double knitting yarns.

Practising the half-treble crochet stitch

With our chosen yarns and hooks at the ready, we began by making a chain of 15 stitches and practising working half-treble stitches along that chain, as the half-treble was the stitch we would be using throughout the basket.

To work a row of half-trebles you must first make the ‘step’ to take you to the height of the next row. On the first row you do this by missing out the first two stitches of the row and working the first actual half-treble into the third stitch from the hook, on subsequent rows you would work two chain into the first stitch. To work a half treble: put the yarn round the hook once in a clockwise direction, slide the hook under the stitch, wind the yarn round the hook once in a clockwise direction, pull the hook back through to the front (this will give you three stitches on the hook), wind the yarn round the hook once clockwise and pull that loop through all three stitches that were on the hook, leaving just that loop on the hook. Repeat for all stitches in the row.

Crocheting the base of the
basket

Once we had mastered the half-treble we were ready to begin our respective baskets. We made a chain of five stitches which we joined into a loop then we worked 12 half-trebles into the loop. On each round that we worked for the base, we increased by 12 stitches per round until the base was the size we wanted. I had decided to make a medium to large basket and I wanted to add at least one pocket. As I was using quite a few strands of yarn I knew that my basket was likely to grow quickly.

Once we had made a bit of headway on our baskets we stopped to eat the delicious lunch which Shenna had provided, the cost of which was included in the workshop fee, making the workshop even better value for money!

Different levels of crocheting skill

There were five of us on the workshop and each with a different level of ability. However, everyone managed to create a basket by the end of the workshop. Everyone agreed that taking home something you have produced during a workshop significantly enhances enjoyment of that workshop. My basket was not complete by the end of the afternoon but I had reached the height where I wanted to put the pocket. Shenna explained how the pocket is made and I have been working on it today. She also offered to wind off enough yarn for each of us so that we could crochet more rounds onto our baskets, if we wished.

Here are some of the baskets that we made:

Basket and cross

The final basket – green! – was made by Anne (with an ‘e’). I placed the cross made out of crochet hooks next to it to ward off evil spirits (there was no garlic available, unfortunately) so that [i] snapping a picture of a green object wouldn’t damage my camera and [ii] I wouldn’t have to fumigate my car because of the pollution caused by a green object.

Anne (with an ‘e’) and I finished out day with a visit to an ice cream parlour called Fredericks which is between Chorley and Bolton. Shenna and the other participants were all talking about the wondrous ice cream from Fredericks. Anne (with an ‘e’) said she knew where it was so I said we would call in on our way home. The ice cream was very tasty but nowhere near as good as I had imagined it would be, and certainly nothing like as good as Rocombe Farm Ice Cream. Oh well, can’t have everything I suppose!

Origami Folded Fabric Pouches Made By Readers of This Blog

Yesterday I was told by two readers of this blog that they had each made an origami folded fabric pouch using this tutorial that I had written. I was thrilled to bits, especially as I was able to see photographs of their makes. I emailed each of them to ask if they would agree to allow me to share the photos on here and I am pleased to report that they were happy for me to do so.

To prove that I am not favouring one over the other I am going to show the pouch made by Jenny of Cobbies Corner first – because it is green! (Why would she spoil my tutorial by making it in green? It’s OK, I’m joking!)

The pouch fastened with a cute flower button

Jenny has used two complementary green fabrics: a polka dot and a gingham. It looks bright and cheerful – perfect for the spring. It is certainly beautifully made, as you can see from the photo above and those below.

The pouch shown with the uppermost
flap open

This picture shows the pouch with both of the
flaps open

It is obvious that Jenny was very careful when she measured and folded the pouch. It looks beautifully neat and centrally positioned. Well done, Jenny!

The second pouch was made by Larisa of Stitching Notes. She has used a pretty purple fabric – yes, I admit it, purple is one of my favourite colours.

The fabric Larisa has used gives a different look
 from the green used by Jenny

Larisa has used an unusual fastening on her pouch. It may be easier to see in one of the following pictures.

This pouch has polka dot fabric on
the inside

The fastening can be seen extending
towards the bottom of the pouch


Tutorial for Origami Folded Fabric Pouch – continued

I realise that in the tutorial for the Origami Folded Fabric Pouch that you can find here, I omitted to explain or show the pockets that would be created in the pouch. With apologies for the poor quality of the photographs (I was trying to hold the pouch open with one hand and take a shot on my iPad with the other!), I shall now try to remedy that.

The design of pouch that I gave instructions for has six pockets. I will show each of the pockets, beginning with the pocket at the back of the pouch and working towards the front.

Lay the pouch on a surface with the front uppermost – see picture 1.

Picture 1

Undo the fastening and lift only the top flap – this will show the pocket at the back of the pouch which is lined with the inner (pink) fabric – picture 2

Picture 2

Next, lift the second flap (which has the inner fabric uppermost) – this reveals the second pocket, which is lined with the outer (flowered) fabric – picture 3.

Picture 3

The next pocket is lined with the inner fabric – picture 4:

 Picture 4

Next we have a smaller pocket, lined with the outer fabric – picture 5.

Picture 5

The next pocket is lined with the inner fabric – picture 6 – and is the same size as that in picture 5.

Picture 6

The final pocket is the one in the centre with the flap fastened with a button – picture 7.

Picture 7
Showing pockets 3, 5 and 6


Tutorial – Origami Folded Fabric Pouch

Origami Fabric Pouch
For some time I have been meaning to write this tutorial for the Origami Folded Fabric Pouch. I was shown how to make it by Mary Loggie who was running craft classes aboard a cruise ship that Peter and I were on.
The pouch is very versatile. It can be used for sewing essentials, make up, knitting accessories, jewellery and even as an evening bag!
It can be made in a size to suit you, although Mary said that if the square of fabric is above about 16 inches it doesn’t work so well. I have not tried to make one over that size so cannot advise further.
I hope you enjoy the tutorial. If you have any problems, please feel free to email me. My email address is dfne@peterjh.wanadoo.co.uk .
Origami Folded Fabric Pouch
Materials:

          1 Fat Quarter cotton or polycotton fabric for outer

          1 Fat Quarter of complementary coloured cotton or polycotton fabric for inner

          Lightweight Interlining [optional]

          1 large button

          1 small button [optional]

          Braid, ribbon or elastic for closure loop

          Matching thread

Equipment:

          Self-healing cutting mat

          Rotary cutter

          24” x 6½” Quilter’s ruler

          Fabric marker pencil

          Sewing machine

          Hand sewing kit

          Flower-head pins, or similar

Instructions:

1.           It is essential to be accurate when cutting and stitching the pouch, otherwise it will end up looking something like this:

Crooked Origami Pouch

Instead of like these:

Origami pouches made for Women’s Refuge

2.           Using the quilter’s ruler, cutting mat and rotary cutter, trim outer fabric to achieve a neat, square edge. Do the same for the inner fabric.

Neatly trim fabric edge
3.           Cut a square measuring 16” x 16” from the outer fabric. Repeat for the inner fabric and the interlining [if you are using it].

Cut square from outer fabric
4.           Lay the interlining on your cutting mat or work area then lay the outer fabric on top of it with the right side facing up.

Lay squares down right sides together
5.           Take the square of inner fabric and place it on top of those fabrics. Place the right side facing down.

Squares pinned together with 3″ gap on right hand edge
6.           Pin the three layers together marking out a 3” section in the centre of one of the sides. [At each end of the section I place two pins at right angles to the edge of the fabric – I find this a good way to remind me to stop sewing when I reach that section!]

I set my stitch length at 2.5
7.          Stitch around the edge of the three layers, leaving a scant ¼” seam allowance. DO NOT stitch along the 3” wide section.

Two pins marking edge of 3″ gap
8.           Remove all pins.

Trim corners
9.           Trim diagonally across all four corners to reduce bulk.

Turn fabrics inside out
10.       Turn the layers so that the right sides are facing out. Pay special attention to turning the corners to make them as pointed and neat as you can.

Press
11.       Press the square, making sure to fold in the edges of the 3” gap. Press those edges into place.

12.       You may wish to pin the edges into position to close the gap. You may also find it helpful to place a few pins across the square, to hold the layers together and prevent slippage. [My walking foot fell to pieces which is why I use the pins.]

Topstitching with pins holding fabric firm
13.       Topstitch around the square, ¼” in from the edge, again with stitch length set at 2.5.

14.       Place the square on your working area with the outer fabric facing down and the corners at 12 o’clock, 3 o’clock, 6 o’clock and 9 o’clock.
Folded edge along bottom with points at
9, 12 and 3 o’clock
15.       Lift the corner at 6 o’clock and place it on top of that at 12 o’clock, creating a fold from 9 o’clock to 3 o’clock. You have created a neat, double-layered triangle.

16.       Pick up the point at 9 o’clock and place it on the opposite side of the triangle, as shown in this picture. The point at which the fabric has folded along the bottom edge I shall call ‘point x ’.

Point at 9 o’clock folded over to
opposite edge
17.       Repeat step 16 with the point at 3 o’clock, as shown, which will create ‘point y ’.
Points 9 and 3 o’clock folded, creating point
‘x’ on left at bottom and point ‘y’ on right at bottom
18.       The picture above shows the shape you should create.

Pin along fold
Both folds marked by pins
19.       You may find it helpful to pin along the folds that you have created or to mark them with a fabric marker.

Marking fold with a fabric pencil
20.       Stitch along each of the folds created at points 16 and 17.

Stitching along the fold
21.       Placing the 9 o’clock point on the opposite side of the triangle and again creating point x, pin the folded fabric into position.

Handstitching from 9 o’clock point to point ‘x’
22.       Hand stitch from the 9 o’clock point along to point x .

23.       Place the 3 o’clock point on the opposite side, again creating point y .

24.       Pin the fabric into place, leaving the 3 o’clock point unpinned.

25.       Lift the 3 o’clock point and fold the fabric vertically from the centre of the open pockets down to where the two folded edges cross over. Mark this line with pins, then stitch down the line to create a triangular pocket.

Stitching along the vertical line to
create a triangular pocket
26.      Hand stitch along the folded edge from point y  to the row of pins down the centre. Be careful not to stitch through more than one layer as this will affect the size and usefulness of the pockets beneath.


27.       Flatten the triangular pocket that is sticking up to the left of the pinned line to create a diamond shaped pocket. Pin then stitch into place.
Flatten the triangular pocket and pin in position

28.       Across the line from the points at West and East, fold down the top point of the diamond [North].
Stitching the corners of the pocket in place
29.       Stitch into place. You may choose to place a small button here.
Attaching a small button to flap
30.       This creates a flap which should firmly hold a folded tape measure if you are using the pouch to hold sewing essentials.

Flaps folded down to close pouch
31.       Fold down the two corners [of the flaps that have been created] at 12 o’clock to close the pouch.

Sewing a large button on the top flap
32.       Stitch a large button on the uppermost flap.

33.       Take your piece of braid, ribbon or elastic. Cut a length of about 6”. Fold it in half then fold in the ends and either pin or sew into place.

34.       Make a loop and check that it is the right size to hold the large button and the flap closed.

Stitching the loop closure onto pouch
35.       Stitch the loop into position.

36.       Your Origami Folded Fabric Pouch is now complete.

Completed Origami Folded Fabric Pouch

** For more information about the pockets created in this pouch, please go to the supplementary post here

Tutorial – Sewing Project Folder

My Sewing Project Folder

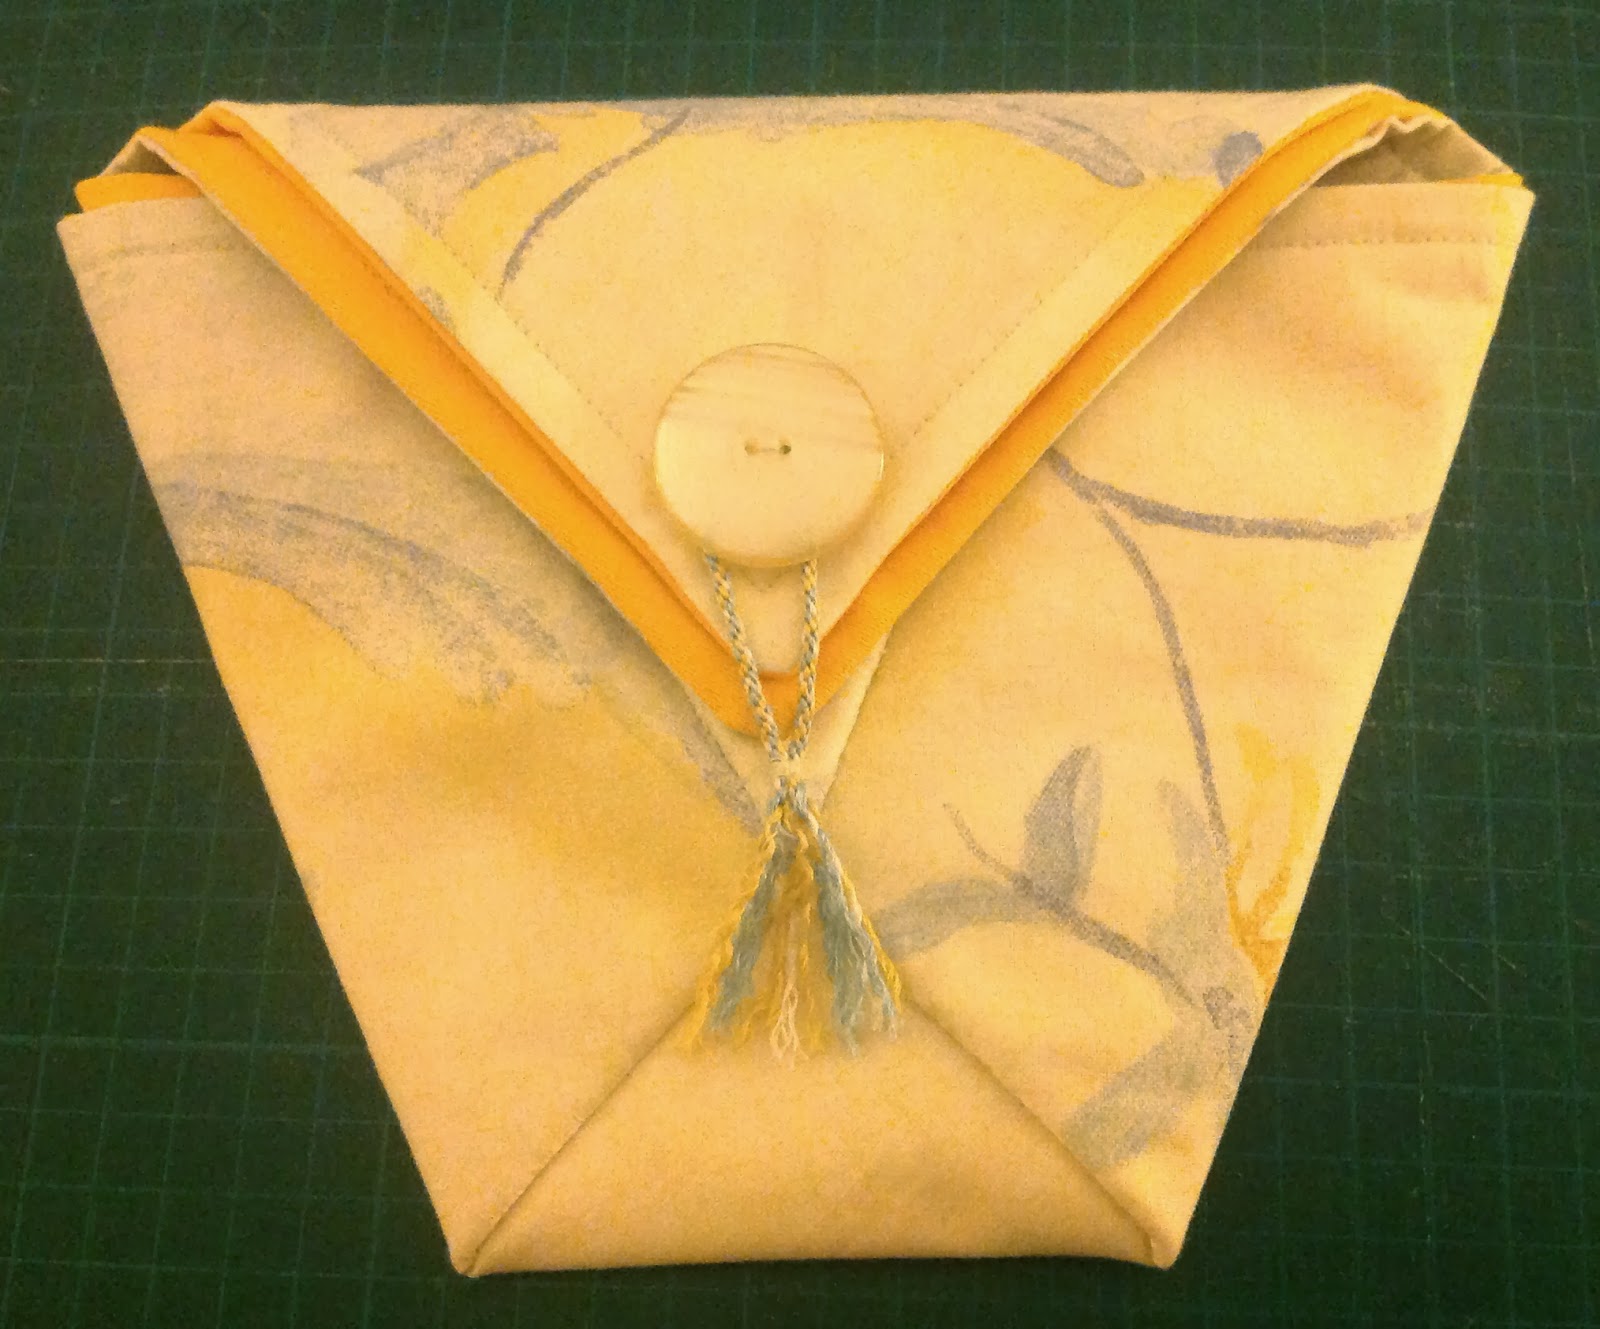
The front of the sewing project folder

This is the tutorial for the sewing project folder that I showed in my last blog post – here. Sorry for the mixture of imperial and metric measurements, for some reason I kept chopping and changing whilst I was making it!

These instructions are for a project folder which includes:
A needle case
Scissor keep
Tape measure grip
Pin cushion
Pocket for sewing wax
Pocket for tailor’s chalk
Full height project pocket

Sewing Project Folder Tutorial

Inside, showing the detachable pincushion

Inside the back cover of the
project folder
 
Materials
½ yard of outer fabric [I used Poppies from Hillary’s Blinds)
½ yard of lining fabric [I used a canvas fabric from my stash]
½ yard of Light Synthetic Interlining
Felt in complementary colour measuring at least 7” x 3”
1 x 3cm button
2 x 1cm buttons
2” x 1” strip of hook and loop tape
10mm wide elastic
½ yd x ½” strip of ribbon
1 long and 2 shorter hair ties
Matching thread
Contrasting tacking thread
1 x A4 ring binder
2 x A4 zip-top clear plastic wallets
Corrugated cardboard
Thin wadding or foam

Tools required
Cutting mat
Rotary cutter
Craft knife
24” x 6” ruler
Pointer and creaser
Sewing machine
Pins
Large and small scissors
Hand sewing kit

Instructions

Carefully remove the metal ring binder bracket from the folder using a knife, screw driver or similar implement. Don’t worry if there are small holes in the folder as these will be hidden by the cover and interlining.

Measure and cut the outer fabric
Using the rotary cutter and cutting mat, cut the outer fabric to fit your folder plus a ½” seam allowance on all sides. My fabric measured about 34” x 15” which included enough for the inside flap.

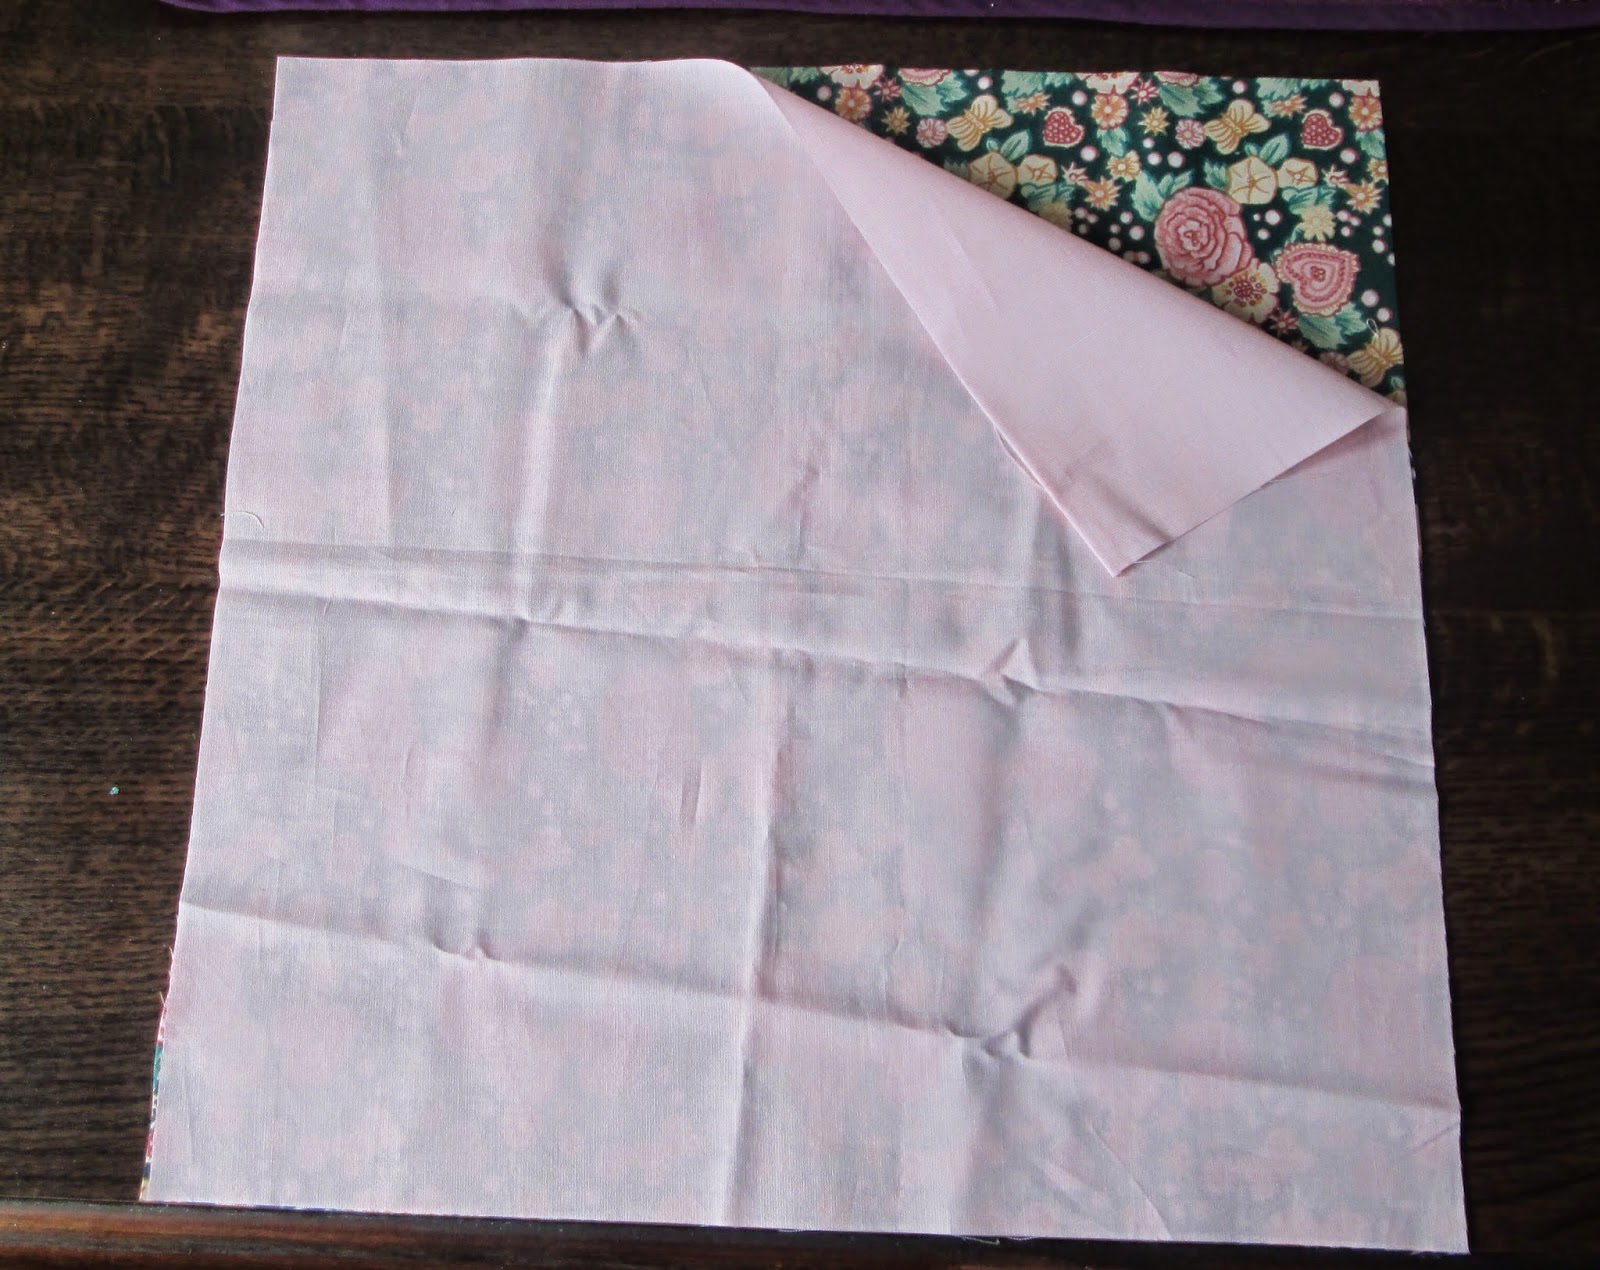
Lining fabric is measured and cut to size
Cut the lining fabric and two pieces of interlining to the same size.

Cut one of each of the following pieces from the outer fabric and one each from the lining fabric:

Wax pocket                     3¾” x 3½”
Tailor’s chalk pocket        4¼” x 3”
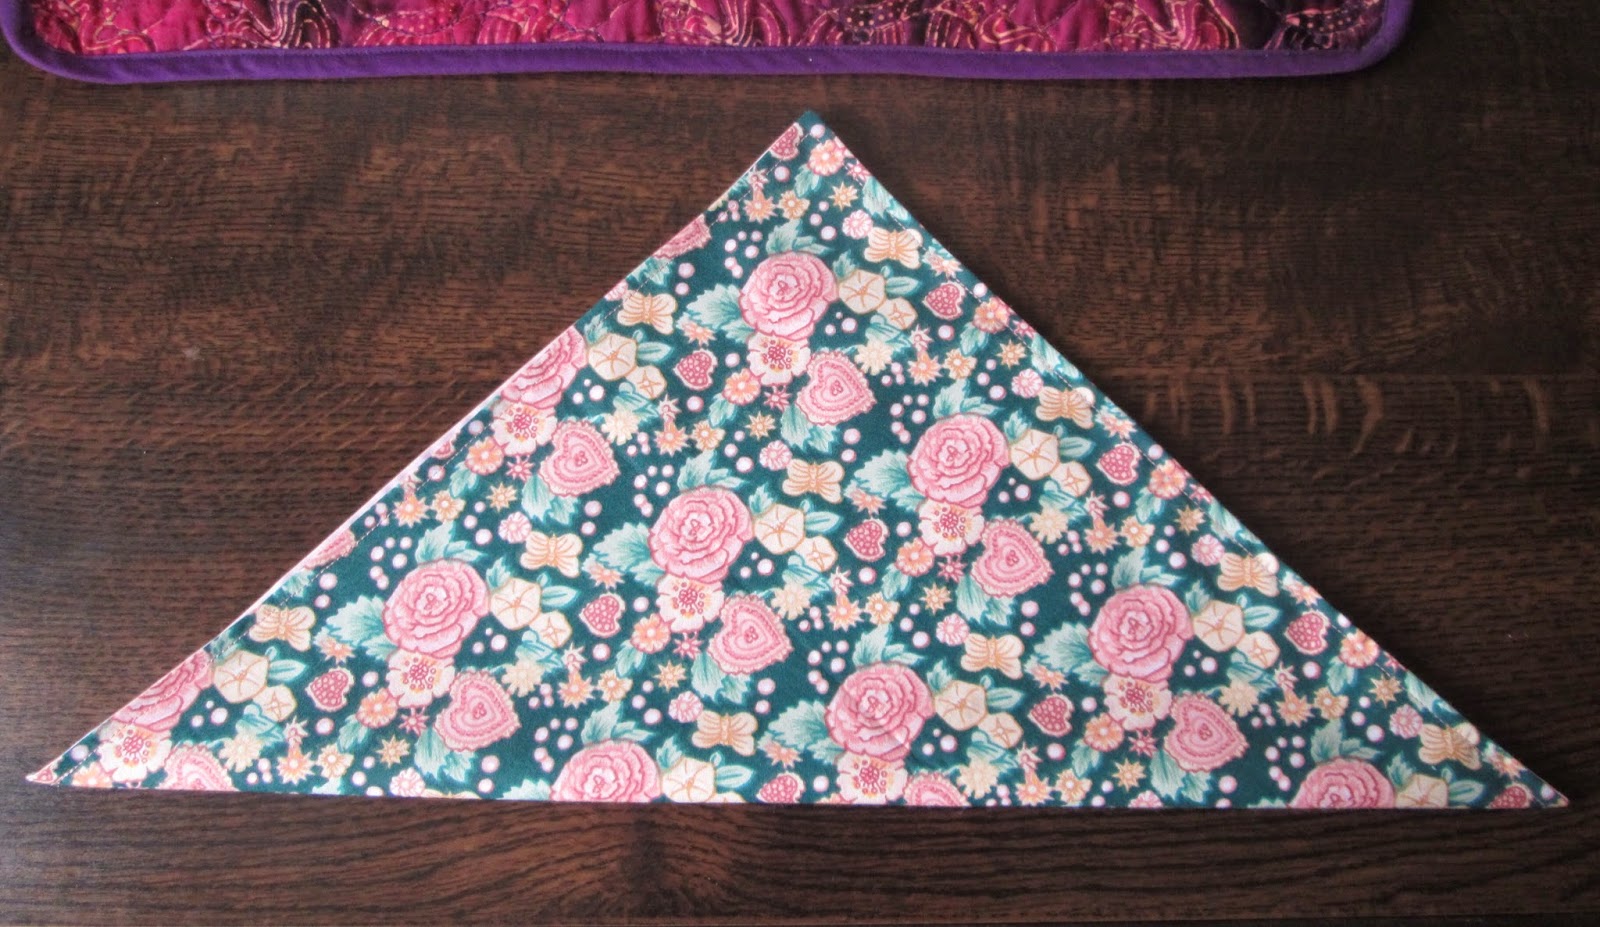
Pincushion                      5½” diameter
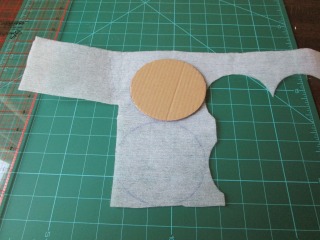
Scissor keep                    Draw around your scissors making the shape shown in the picture

Outer and lining fabrics cut to size
for pockets
Using the craft knife, cut two circles of cardboard 4” diameter.

Using large scissors cut two circles from the thin wadding [or foam] 4” diameter.

Mark and cut the thin wadding
Using either the rotary cutter and mat or the large scissors, cut a piece of felt measuring 7” x 3”

Pincushion:
Attach the loop tape with zigzag stitch
 
Taking the piece of hook and loop tape, machine stitch the soft looped part to the centre of the right-side of the circle of lining fabric. Use a zigzag stitch and make sure the tape is firmly secured.
Running stitch to gather edged of
pincushion
 
Sew a running stitch around the lining fabric circle about ¼” in from the edge.
Place one circle of thin wadding [or foam] in the centre of the circle, on the wrong side, and put one cardboard circle on top. Pull the running stitch to tightly gather the fabric around the wadding and cardboard. Secure with stitching.
Repeats these steps for the circle made from the outer fabric.
Stitch front and back of pincushion
together
 

Place the two circles together with the rough edges facing and firmly stitch them together using a slip stitch.

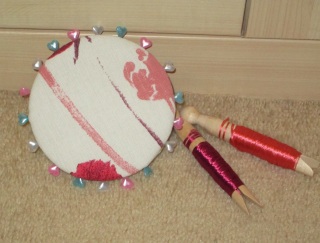
The completed detachable pincushion
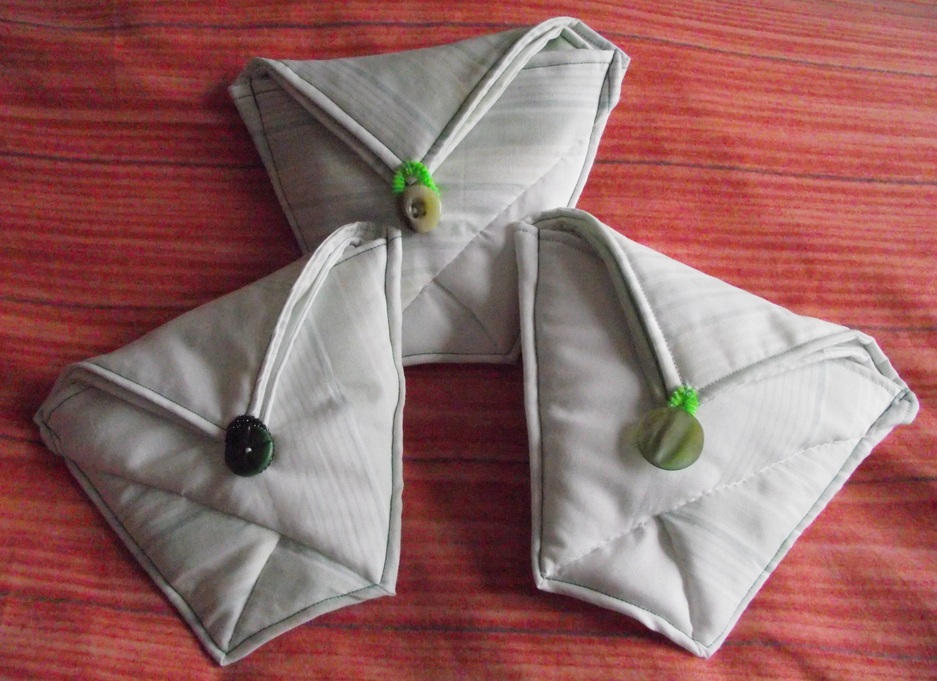
Scissor keep:
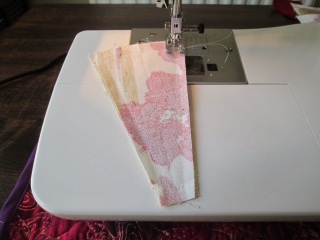
Fabrics being stitched right sides together
for scissor keep
 
Place the outer and lining fabric shapes right sides together.

Machine stitch down one side, across the bottom and up the second side using a ¼” seam allowance and leaving the top edge open.

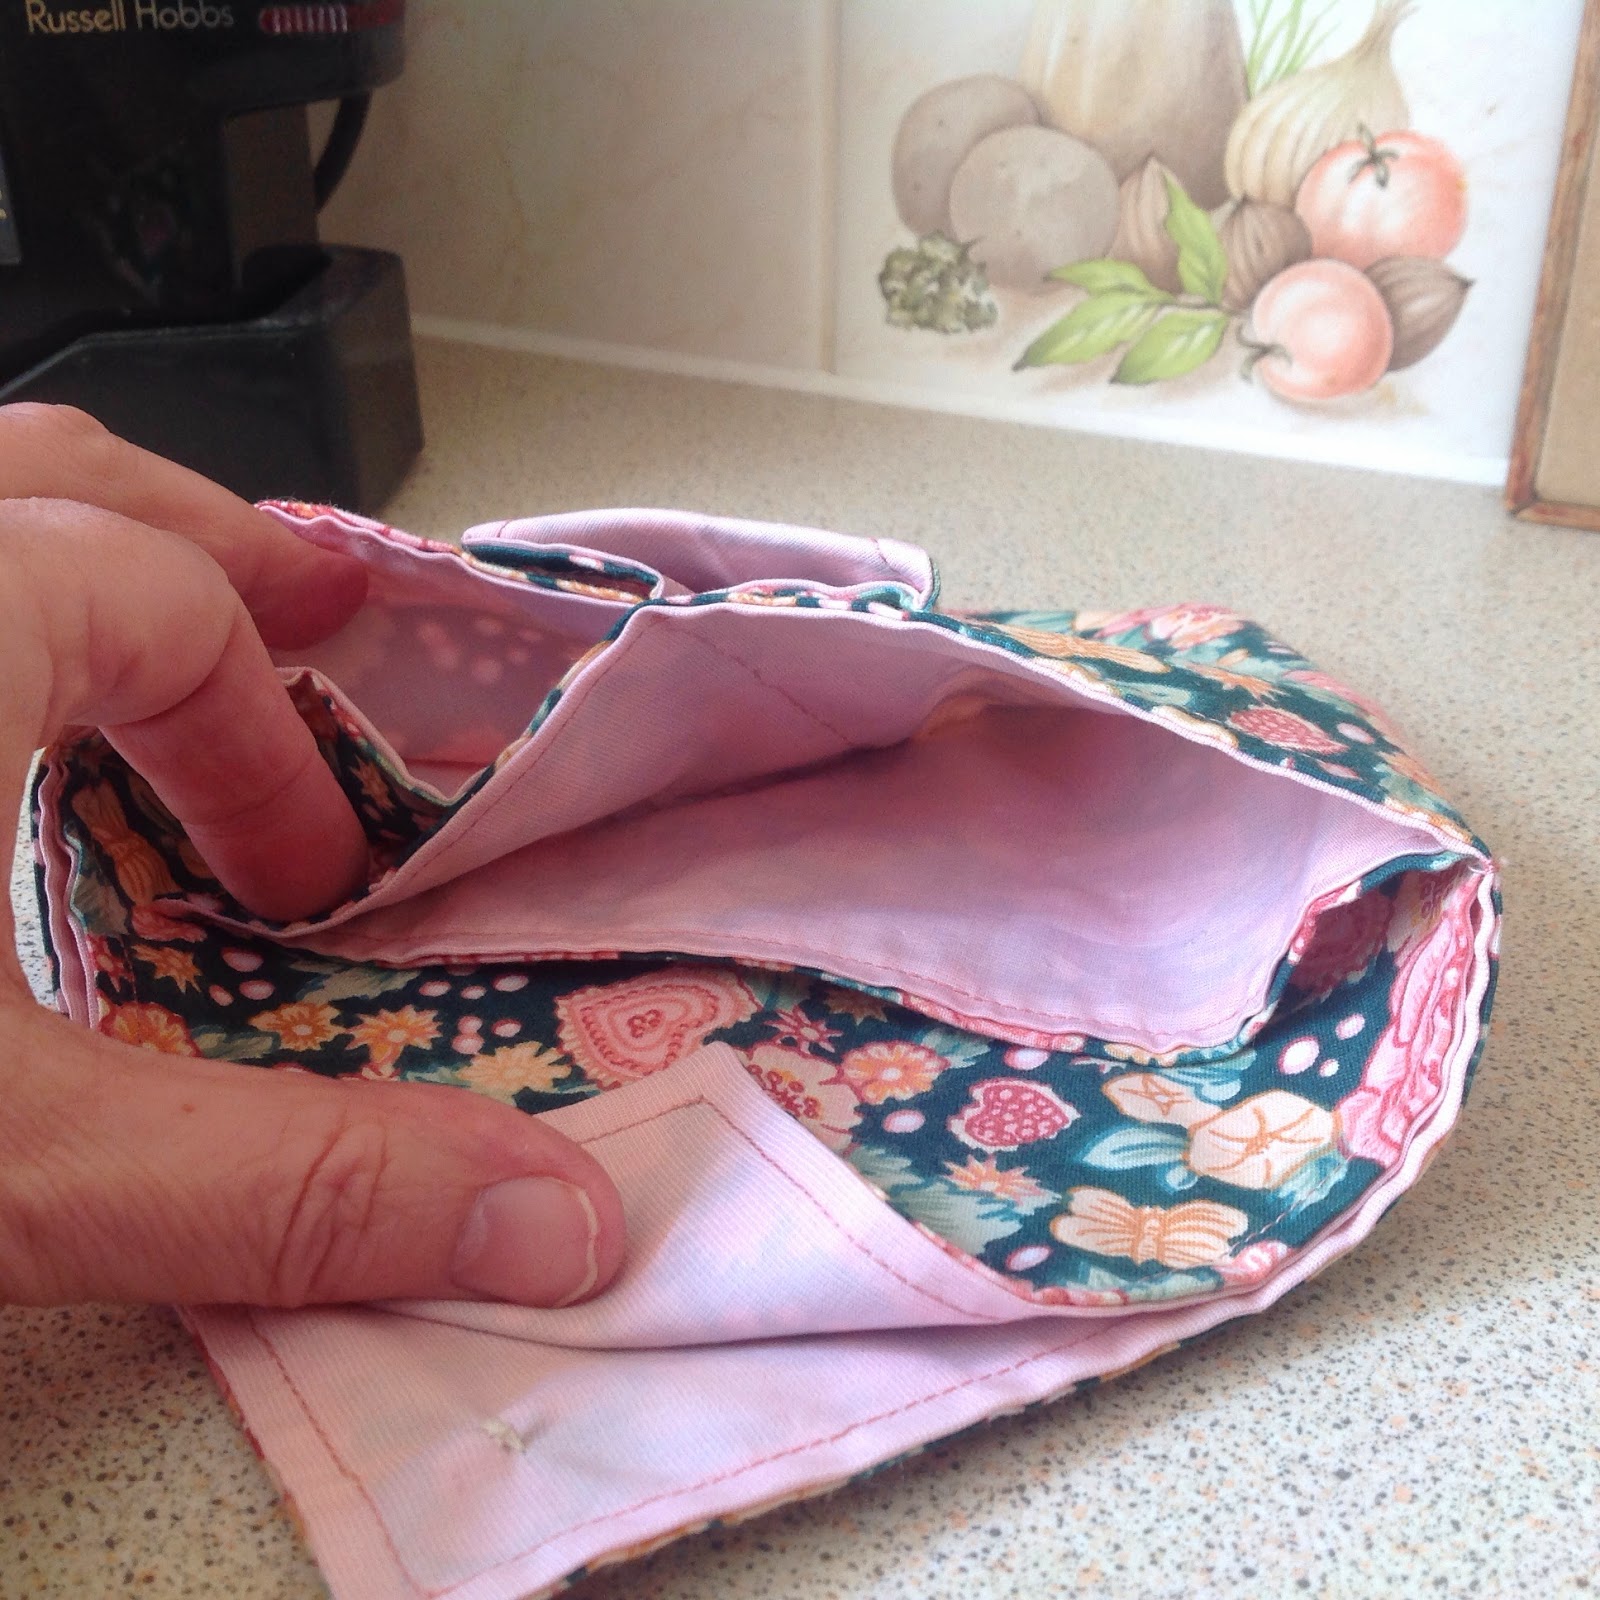
The scissor keep has been turned right
sides out


Using the pointer/creaser, turn the scissor keep so that the right side is out and press to neaten edges.

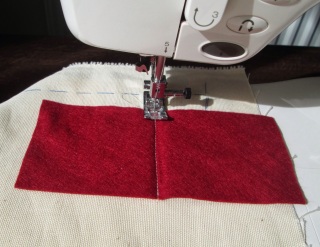
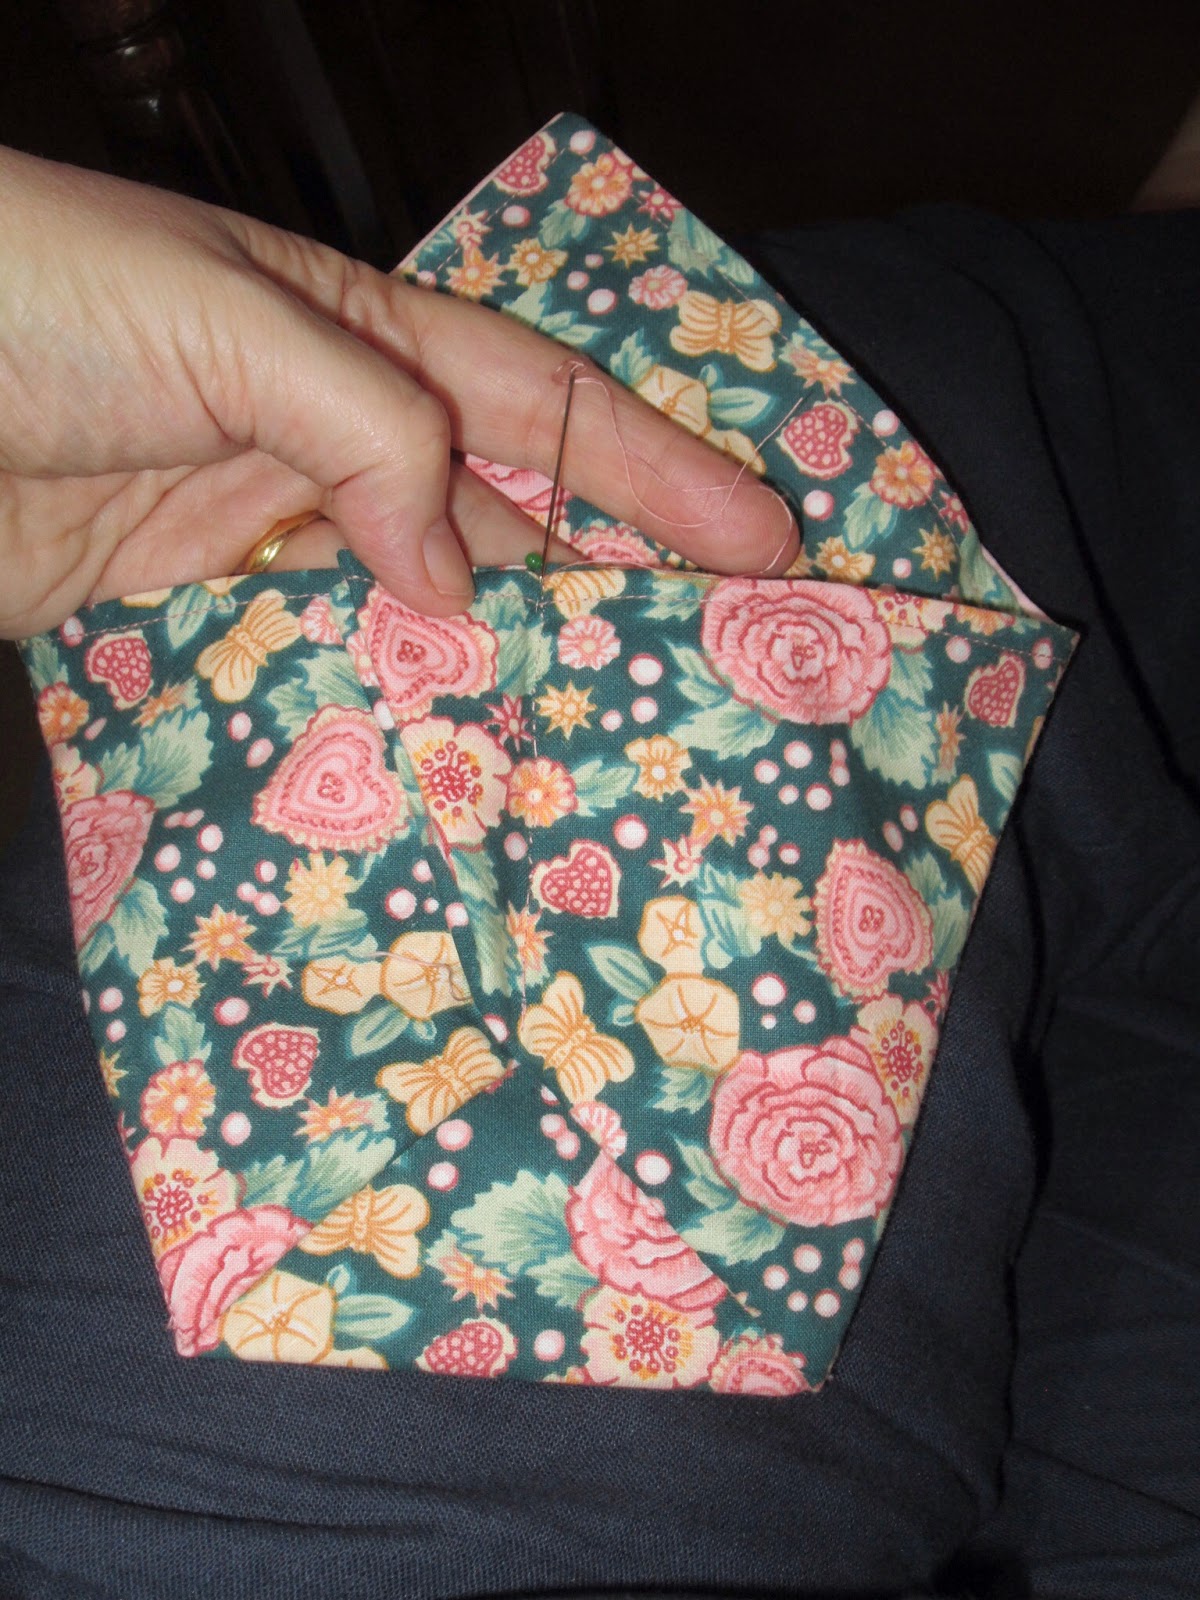
Stitching top edge together

Fold in the top edges, pin together and neatly stitch ¼” in from the top edge.

Pockets for wax and tailor’s chalk:

Follow steps shown for the scissor keep for each pocket.

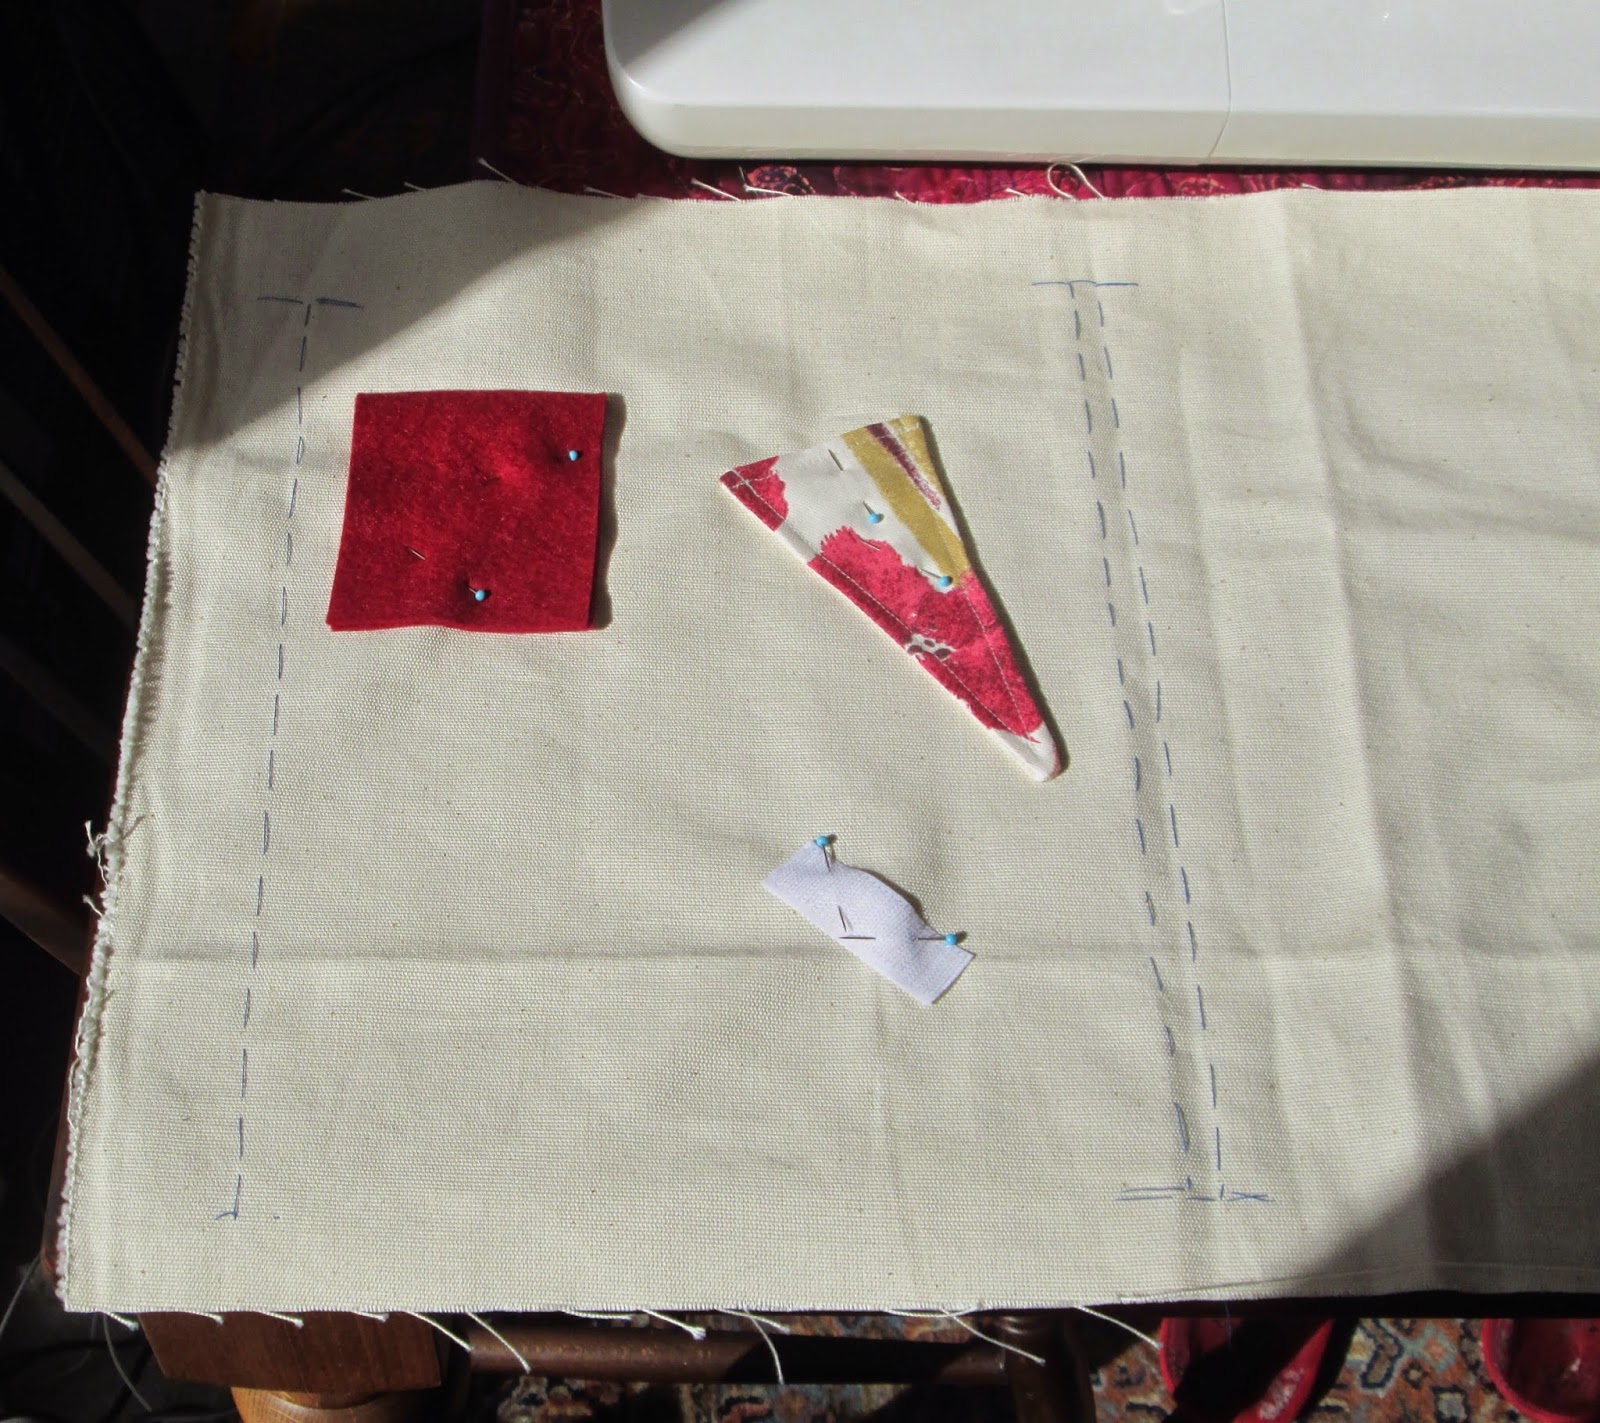
Position the pockets and features on
lining
Lay the lining fabric on your working surface, right side up and decide where you wish to place your pockets and other pieces, bearing in mind that there will be a large flap on the inside back of the folder. Pin each piece in place and stitch by machine or by hand, to secure. Fold the strip of felt in half and sew along the inside of the fold to secure it to the cover.

Stitch inside the fold to attach the
needle case
Measure and cut two lengths of elastic, each to be stitched into a loop. Attach both loops to the cover to hold your tape measure.

Elastic loops for tape measure to be
attached
Add other pockets and loops as required.

Inserting the plastic wallets

Open the A4 folder and place it on your working surface with the inside facing uppermost.

Place the lining fabric on top of the folder, with the right side up and with the stitching line for the seam allowance for the left side exactly in line with the left hand edge of the folder.

Using the contrasting tacking thread, mark the entire edge of the folder on the lining fabric by tacking along the edge.

The blue lines of tacking can be seen
in this picture
Where the front of the folder meets the spine, mark on the lining fabric by tacking along the entire length of the fold. If you are using a plastic folder you will need just one row of tacking. If you are using a cardboard folder you will need to mark both sides of the ridge that forms on that fold. DO NOT tack along the fold on the other side of the spine.

The spine of my folder measured 1 3/8” [3.5cm] and the following measurements are based on that size, going from the farthest right hand tacking line and pinning each fold to secure. See picture for more explanation.

Measure 3/8” from the left down the entire length of that line. Make a valley fold in the fabric.
Measure 5/8” to the right and make a mountain fold
Measure 5/8” to the right and make a valley fold – this is Groove A.
Measure 5/8” to the right and make a mountain fold
Measure 5/8” to the right and make a valley fold
Measure 1 1/8” to the right and make a valley fold
Measure 5/8” to the right and make a mountain fold
Measure 5/8” to the right and make a valley fold – this is Groove B.
Measure 5/8” to the right and make a mountain fold
Measure 5/8” to the right and make a valley fold

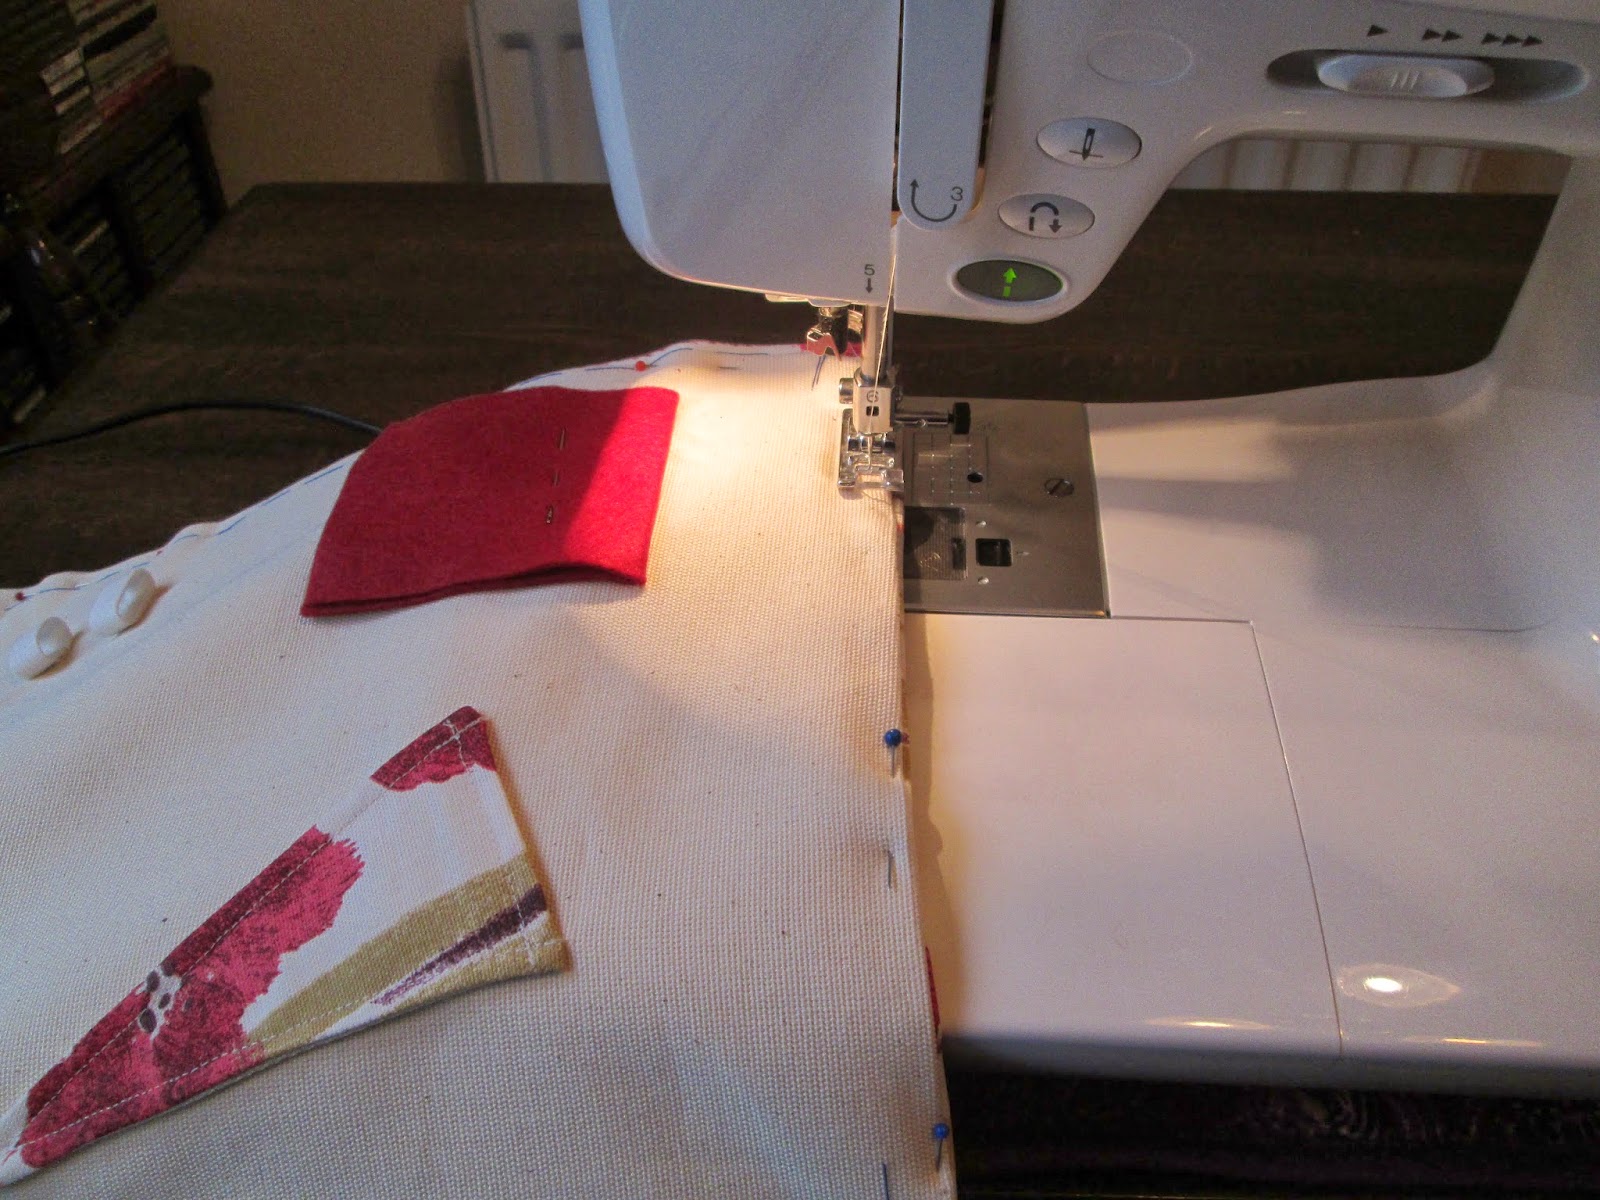
Take one of the zip-top wallets and place it along Groove A. Pin it in place.

Using the sewing machine, stitch the wallet securely into the groove using a wide zigzag stitch. I did two rows of zigzag using a different stitch length for each row.

Insert the second wallet into Groove B in the same way.

The edges have been secured with zigzag stitching
and must now be trimmed
Do a double row of zigzag stitch across the top and bottom to secure the edges of the wallets and prevent fraying. Neatly trim the fabric back to the stitching.

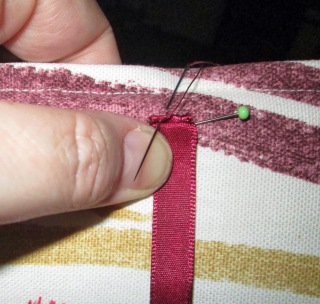
Sewing the hair tie for the scissor keep
Stitch the long hair tie above the scissor keep so that it will lop around the button.

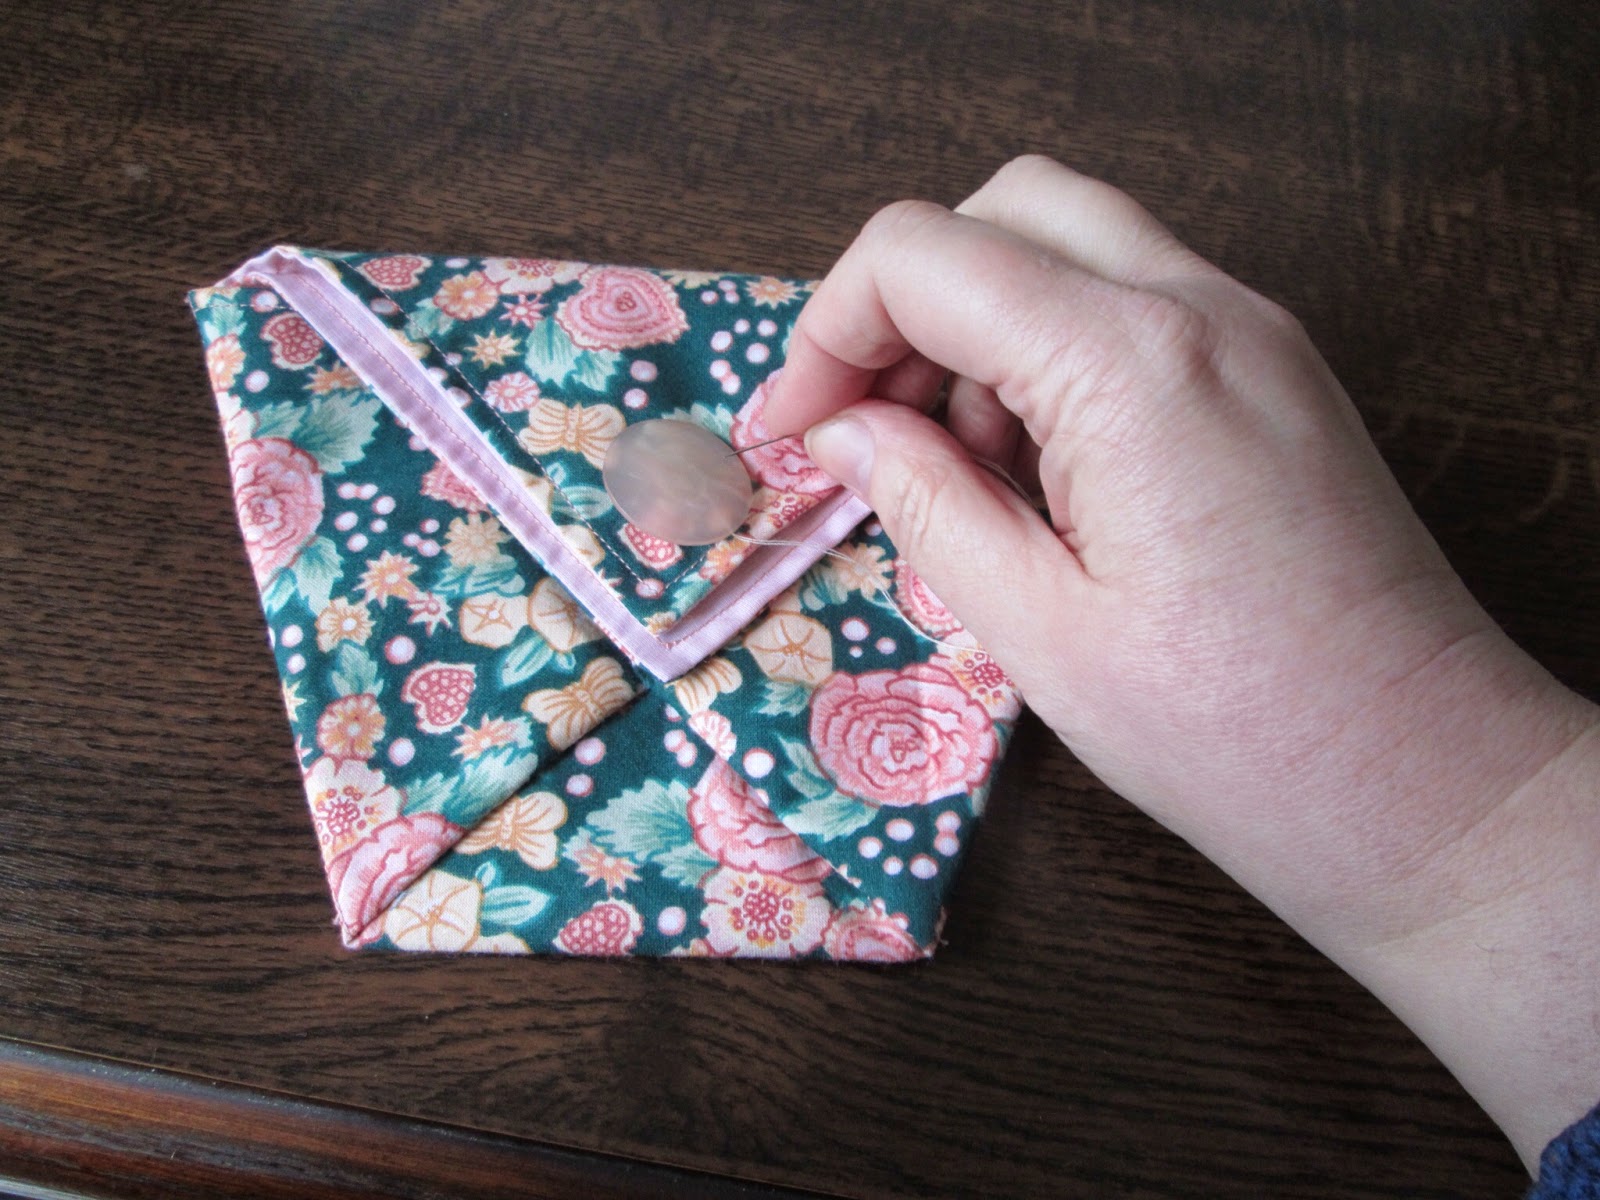
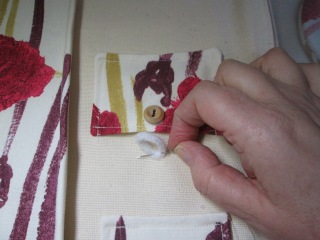
The button for the scissor keep
Stitch the large button on the scissor keep and a small button on each of the wax and tailor’s chalk pockets.
A small button is stitched onto each pocket

Stitch a short hair tie above each pocket that has a small button, to loop over those buttons.
As I was sewing this after the folder was made
it was easier to turn the folder around!

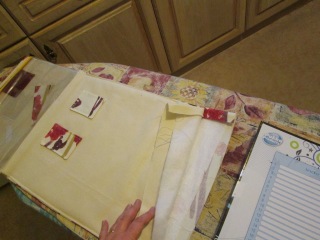
Lay the lining fabric on the working surface with the wrong side uppermost. Place the interlining on top and pin in place [with the pin on the right side of the lining] folding the seam allowance of the lining over the edges of the interlining. Repeat for the outer fabric.

Outer fabric and interlining pinned together
Place the outer fabric on the working surface with the interlining uppermost. Place the outside of the A4 folder on the left hand side of the interlining leaving the seam allowance showing around the top, left and bottom edges.

Outer fabric and lining fabric pinned
together
Place the lining fabric on the inside of the folder, with the interlining face down. Align it with the outer fabric and pin in place around the top, left and bottom edges.

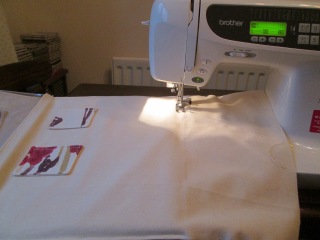
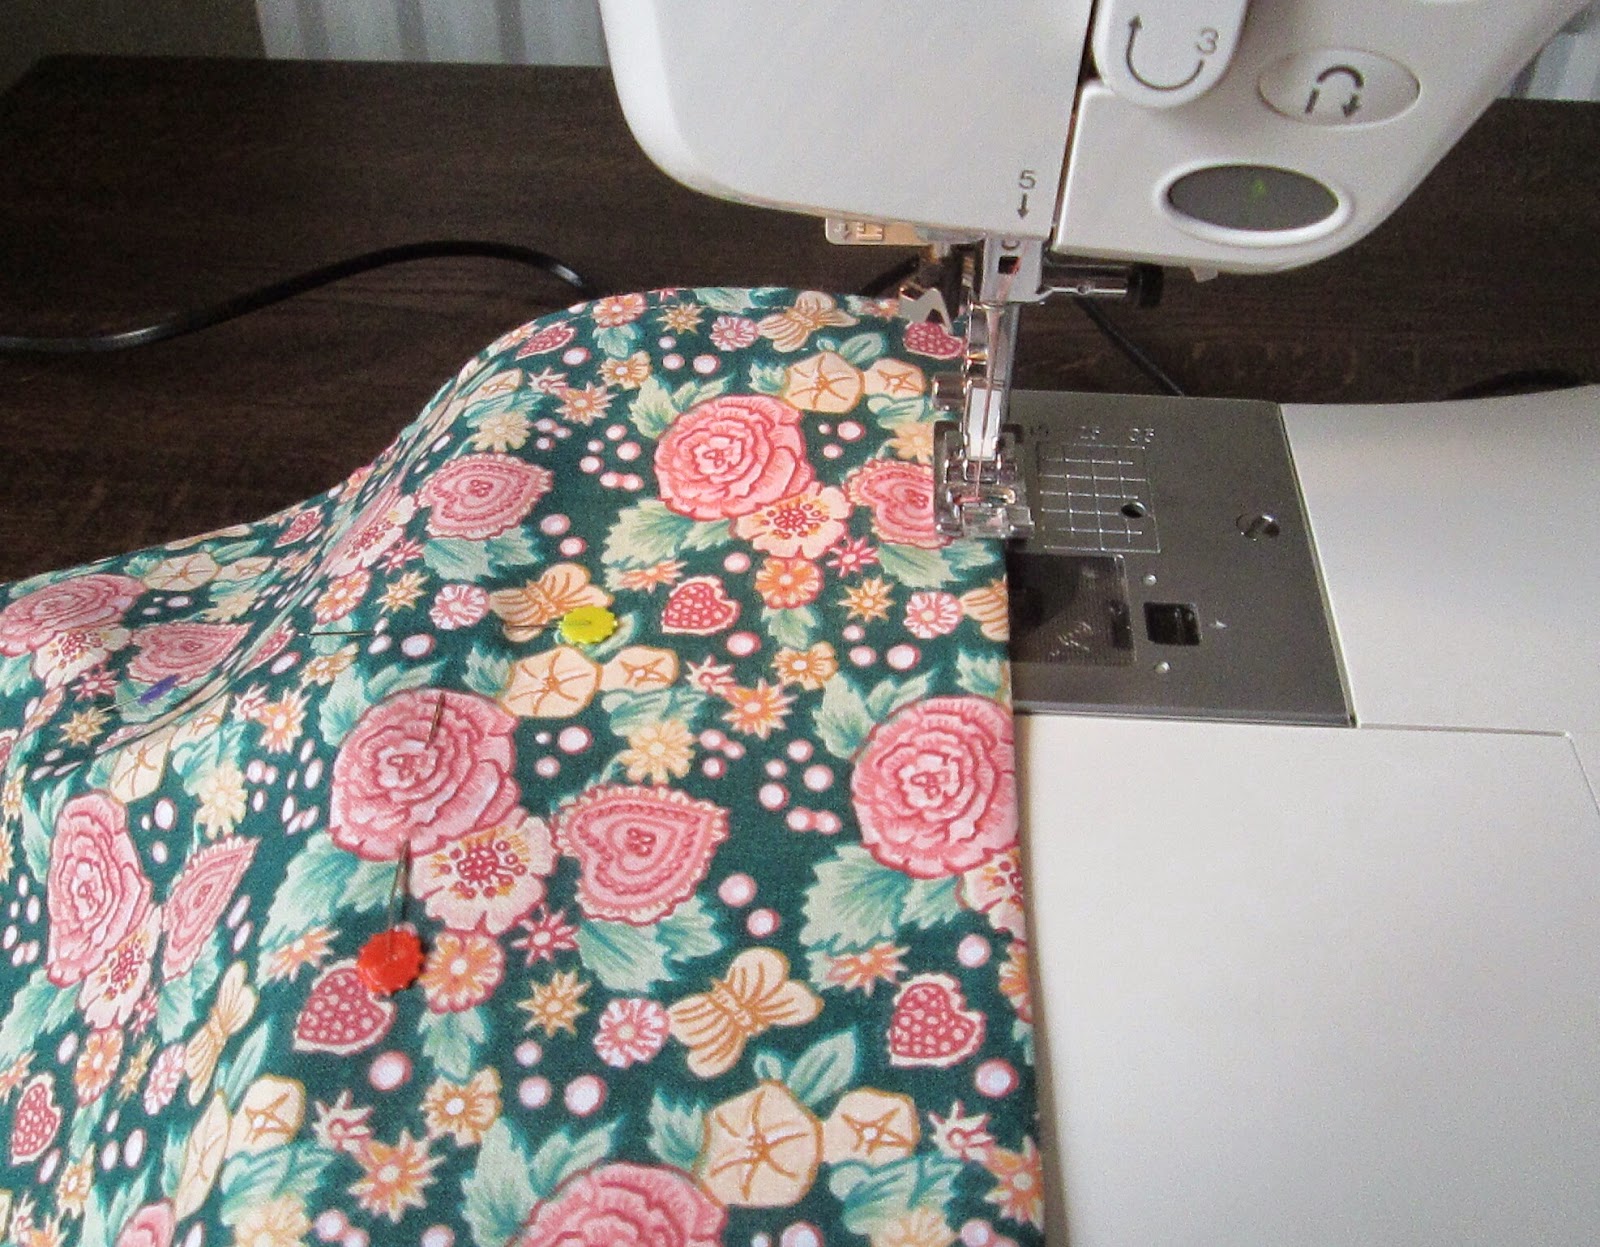
Stitching outer and inner together
Machine stitch along the three pinned edges, using a straight stitch and keeping the row of stitching as close to the edge of the folder as you can. [I removed the folder before stitching but it could be left in place. If you do remove the folder, you should now slide it into the cover.]

Preparing to slide the folder into the cover
Pin down the right hand edge then machine stitch in place, again keeping as close to the edge of the folder as possible.

Stitching the right hand edge once the
folder is inside
Fold in the seam allowances around the three loose edges of the flap and pin the outer and lining fabrics together.

Machine stitch around the three sides of the flap.

Fold the flap inside the back cover and stitch along the top and bottom to secure it. [I hand-stitched these because of the thickness of the fabric.]

Hand stitching the flap into position
Cut the length of ribbon in half and attach one piece halfway down the open long edge on the front of the folder and the other opposite it on the back cover.

Stitching the ribbon tie into position
Your sewing project folder is now complete.

Sewing project folder, tailormade to your
own requirements