Ever Wondered What To Do With A Few Bits Of Ribbon?

Have you ever wondered what you could use a few scraps of ribbon for? The odds and ends of ribbon that you keep from boxes of chocolates or that lovely basket of smellies that Aunt Agatha gave you three years ago? Well, I am here to give you an idea which will not only use some of your stash, but will also help babies in Syria.

Loops-a-Playsies for Syrian babies

Many, many Syrian children are among the refugees currently in countries like Lebanon, Turkey and Jordan but also amongst the internally displaced persons in Syria itself. Life is indescribably hard for ordinary Syrian citizens living within their own country. How much worse must it be for the children, so many of whom have only ever known the hardship and deprivation caused by the conflict which has been raging in their homeland for years?

If you have read any of my previous posts on this blog, you will probably know that much of what I make is for Syrian children. Usually, the items that I make and donate to Syria Relief are knitted or crocheted clothes for the children. I have also made stuffed toys such as these:

Teddies, rabbits, cats and dolls


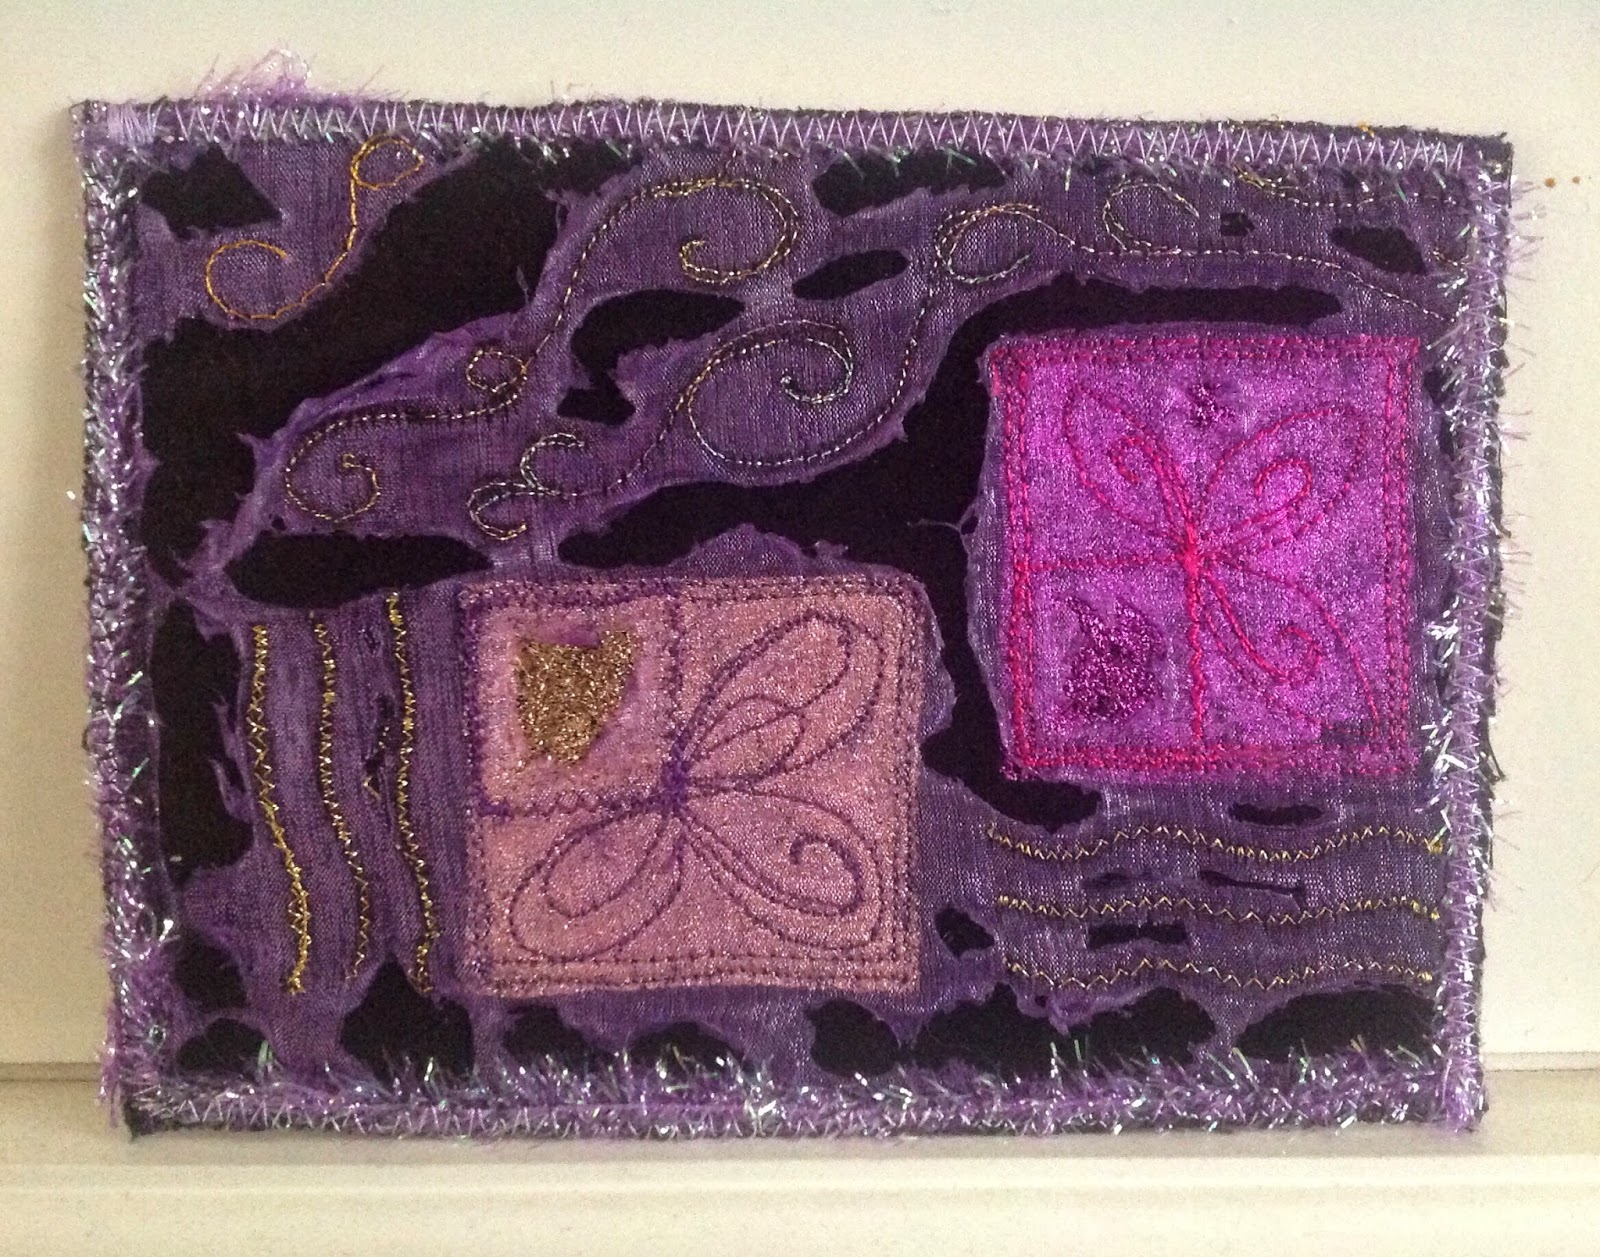
This week, however, I have been making taggies Loops-a-Playsies for babies.

Taggies Loops-a-Playsies made from my stash


It is well known that babies need stimulation to help their development. I really cannot imagine what effect the conflict is having on those young lives but it occurred to me that making taggies Loops-a-Playsies for some of them would be simple and may help them a little. Furthermore, as the taggies Loops-a-Playsies are flat, they should be easily transportable to Syria when a shipment of aid is sent by Syria Relief.

More taggies Loops-a-Playsies 
for Syrian babies

These photos show the taggies Loops-a-Playsies I made yesterday, but my sewing machine is poised and ready to continue making them today!

At the moment the earthquake and aftershocks in Nepal are dominating the news, and rightly so, but please don’t forget the ongoing disaster that is happening to the Syrian people.

If you would like to make a donation to the Nepal Earthquake AppealCLICKING HERE will take you to the “Big Give”, where your donation may be doubled.

If you would like to make a donation to Syria ReliefCLICKING HERE will take you directly to their donation page. You even have a chance to choose how you would like your money spent!

Please don’t forget GIFT AID if you are a taxpayer. It makes your donation go that bit further.

** Since writing and first publishing this post I have been advised that “taggies” is a trademark. I did not know that and was under the impression that it was simply an informal name given to this type of baby toy. For that reason I have decided to call mine “Loops-a-Playsies”. My apologies to the owners of the aforementioned trademark.

Well, What Do You Know?

It’s been a bit quiet here lately, hasn’t it? What do you think the reason might have been? Well, here’s a clue:


And, here’s another:


And here is your final clue:


Yes. I’ve been on holiday. Peter and I went on a tour of Turkey. Consequently there wasn’t  much crafting going on during the second half of March. In fact, despite the fact that we were doing a coach tour, up until I was finishing my packing on the day we were leaving, I wasn’t even going to take anything crafty with me! No, really! I had decided that I would go craft-less for the duration. However, once I had seen how much room was left in my suitcase at the end of the packing process, I thought I may as well take some knitting. Here are some of the things I brought back:

Shaggy hats for Syria Relief


Regular readers will have seen similar shaggy hats previously, but the stripey hats below are a variation on the scrappy yarn theme. I had found several small remainders of balls of yarn and decided that, rather than chop them down for shaggy hats or crochet multicolour squares, I would join them all together randomly and knit as a complete ball of yarn.

Hats for Syria Relief, knitted
with scraps and ends of balls

I am quite pleased with the result of that experiment so shall probably try that again, when I have another collection of part-balls.

Old Uzbek Suzani 

The hats are not the only things I brought back from Turkey. I treated myself to the Suzani in the above photo, which had been imported to Turkey from Uzbekistan. That photo doesn’t do it justice so let’s try this one:

Detail of old Uzbek Suzani

Hmm, that’s still not great. How about this:

Corner detail of Suzani

I think that’s probably the best reproduction I can get.

Peter and I were visiting an old tower in Istanbul when I noticed that there was a shop selling textiles. Well, it would have been rude not to visit, wouldn’t it? And, once you’re there, you have to buy, don’t you? When we saw this old Suzani from Uzbekistan we both really liked it so I decided to buy it. It cost far more than I would usually pay for a textile item but it is beautifully worked, silk on silk and I just didn’t want to resist – so I didn’t!

The final photograph I am going to show you is of a shop window I saw one afternoon, in Ankara, I think.

Singer sewing machines are
truly international!

No, I didn’t buy one of those!

Seriously Playing – Part One

Postcard from Jane


Recently I have been doing some serious playing. Well, there’s no point playing if you’re not going to do it seriously, is there? Let me start by explaining why I’ve been spending time playing.

Postcards from Sheila and Irene


At the end of last year I received handmade postcards from several members of the Be Creative group that I belong to. They had decided to send me some postcards because of the health problems I was having. I had no idea that I had been chosen until the cards began to arrive: it gave me such a thrill to know that they wanted to send them to me! All of the postcards were beautiful and graced our mantle shelf until just a couple of weeks ago. 

Postcard from Liz
Postcards from Wendy and Jan

In fact, they are so beautiful that I decided they needed to be stored in a special box: the trouble was, I didn’t have a special box! “Aha!” thought I, ” I’ll make one”. I had seen a photograph of an exquisite box posted on Facebook by one of the group members which was what gave me the idea. The next step was to figure out how to make something even vaguely similar.

Bits and pieces to play with


I must stress, at this stage, that I have no real idea of how to achieve what I am after. It has taken me since the beginning of the year to figure out how to even start, but start I have. I knew that I needed to create some sort of material or fabric that I could use to form the outside of the box and that I wanted to burn some of the fabrics that made up that material.

More bits and pieces

I began by gathering together all sorts of odds and ends which I could build up to create a fairly firm piece of ‘fabric’. Some of the things I grabbed were: painted pages from an old book;  torn out pages from magazines; coloured papers from my stash; scraps of handmade papers; cellophane sweet wrappers; plastic ‘foil’ wrappers; paint colour chips; damaged used postage stamps; scraps of fabric, lace, yarn and ribbon. I also used some fabric from my stash as a backing [I don’t know what type of fabric it is but I always describe it as something like a cross between canvas and calico] and some organza.

Starting to cover the fabric


The first step was to cover the backing fabric with torn pieces of the papers. The main colours I was using were blues, reds and purples, but I wasn’t restricting myself to only those: I knew I needed to add some flashes of contrast. I used small dabs of stick glue on the reverse of the papers so that they would hold in place.

The first layer is complete

When I had completely covered the backing, I began to add a second layer using the other scraps I had pulled together. At this stage, I decided that I wanted to just roughly cover the first layer: it would not matter if the first layer showed through in places.

I covered the entire piece with a single layer of organza and took it carefully to the sewing machine. This was a delicate operation as I had constructed the piece in my craft room, upstairs, and had to carry it to my sewing machine, downstairs! I lightly stitched all over my fabric, using freehand embroidery. The idea was merely to hold everything roughly in place.

The lightly-stitched second layer

The next stage involved added a third layer of scraps, again, just roughly covering what was already in place. I added another layer of organza and took it to the sewing machine.

My completed first piece


This time I stippled the fabric closely all over. As you can see, the organza plus the stippling has muted the pieces beneath which, I think, helps to blend everything into one visually cohesive fabric. Another benefit of the close stippling was to create a reasonably firm material to use in the creation of a box.


In Part Two I will tell you more about this piece and those that followed.

It Was There One Minute…!?!

Singer Brilliance 6180

Who knew what an eventful day today would be?

As I was up fairly early, I decided to begin sewing another fleece hat before breakfast. No, I’m not mad! Honestly! I am having some problems with lack of energy at the moment and have found that I can manage it better if I do a little then rest.

As I began to sew the Singer was rather clunky. This had happened a couple of times yesterday but I had not really thought much about it. However, it didn’t sound happy. Hmmm. Anyway, I only did a little sewing then decided to check my emails whilst having a cup of coffee. How lucky was that? Actually, luck seemed to have been on my side this week!

I had received an email from a Brother sewing machine dealer which said that, for the duration of the Knitting and Stitching Show at Alexandra Palacethere are reductions on some of the Brother range. Woohoo! The Brother NV1250 sewing and embroidery combination machine, which is the one I had decided on when I was at David Drummond’s shop in Edinburgh, was reduced from £1299 to £899! That’s a massive £400 reduction.

Brother NV1250 combination sewing and
embroidery machine

Well, it took me about three seconds to decide to buy it. Although I had been wondering about buying the new model when it is released, I couldn’t see any sense in paying more than double the cost of the NV1250 – especially as I am only buying a combination machine in case I want to use the embroidery function.

The decision also included returning the clunky Singer to Lidl. It was only ever a stopgap but I had already realised it was likely to start playing up. In fact, it did play up when I finished sewing the hat a little later.

I rang David Drummond after breakfast and bought the machine and some other bits and pieces to start me off and then promptly tried to use the credit card I had paid for the trip to Antarctica with – and payment was declined! Oops! Thank goodness I have another credit card. Phew, disaster averted… for a while.

After lunch I returned the Singer to the Lidl store where I had bought it. I was surprised and impressed with how easy it was to return the machine. I had anticipated reluctance to deal with the matter but the process was very easy. The assistant asked if I had changed my mind or if there was a problem with the machine. When I explained that it was making a clunking noise they immediately offered a refund. 10/10 for customer service, Lidl.

I returned home to be told that there had been two phone calls for me whilst I was out. The first was from the credit card company. Suffice to say that when I rang them back their service was not as good as Lidl’s! When I rang the second caller, I discovered that my good luck had run out. I was told by David Drummond that Brother are unable to deliver my new machine for about a month. Apparently, the company had set up a promotion on the NV1250 for the duration of the Ally Pally show, but didn’t have any stock in the UK! How’s that for forward planning?

Now I have to wait for ages and ages and ages and ages for my new machine to arrive. So, the Singer was there one minute and then it went back to Lidl. And the Brother… well, it was nearly there one minute…


Sewing Machines

Picture the scene. Bossymamma sitting at her lovely new sewing table. Earlier in the day she had cut out the fleece fabric for six or seven hats for children in Syria. Lots of lovely, bright colours which would be a joy to sew and, subsequently, to wear. Hmph! Except the joy was missing!

Brother Super Ace II


My lovely sewing machine, which my Little Sis gave me, was being naughty. It decided it didn’t want to stitch all the layers together. It had a huuuuuggggeeee hissy fit. It did the sewing machine equivalent of stamping its feet – it kept snapping the thread.

I rethreaded the machine. It did it again. Play that scene in your head about a dozen times. I checked the bobbin. It did it again. I used a different bobbin. It did it again. I already had a ballpoint needle in the machine but I out in a new one. It did it again.

Can you spot a pattern developing here?

Another Brother Super Ace II

I switched off the machine, took off the cover and cleaned all around the tensions discs then carefully replaced the cover. I switched the machine back on and tried again. It did it again. So then I cleaned the bobbin area and, guess what? It did it again!

Next, I checked the manual. I went through every suggestion that was made, except the final one. I didn’t like that one! It said to contact the service centre. When I had to have the machine repaired last year I decided that if it needed any further work I would replace it. So, instead of contacting the service centre, I went online to double check the machine I had settled on during my visit to David Drummond’s shop in Edinburgh. That was a mistake as I was distracted by looking at the Brother NV2600 which is due for release next month.

I realised that I wasn’t going to be able to make a decision but then I remembered a special offer that I had seen advertised. I jumped in my car and drove to Lidl where I bought a Singer Brilliance for £99! It was the last one in the shop. I couldn’t believe my luck!

A big box – but not hugely enormous. 

I had decided that I could use the Singer whilst I decide which machine I want to buy. I hope that I will then be able to sell it for a reasonable price once I have my new machine installed.

The Singer Brilliance 6180

The machine itself doesn’t look vastly different from the Brother, on first inspection. However, it doesn’t take long to see the inferior quality of the Singer. When Little Sis and I were checking out the Super Ace II before she bought it, it was the latest all-singing, all-dancing model and the price reflected that. The Singer Brilliance is not at that sort of level but it’s a good little machine for the money. It was certainly worth paying £99 for it!

Singer Brilliance with table

Not only that, but it even has a small extension table included in that price! That’s something the Brother didn’t have.

I have tried the Brilliance today and it stitched the fleece easily – thank goodness. You will probably hear more about the machine, depending on how I get on with it.

Back On Speaking Terms With My Brother

We hadn’t spoken for a while. Well, you know how it is. Life gets in the way. There is always something urgent and then other things crop up which are even more urgent. Plans go awry and, before you know it, three months have disappeared!

That is exactly what happened with us. Everything had been fine between us, no sign of any problems but we had simply drifted apart.

On Tuesday all of that changed. We put aside any possible idea of a rift and it was as though we had never been apart. Business as usual. Everyone happy.

I sat with my lovely Brother sewing machine and made this litter of teddies… and a couple of bunnies hopped along and joined us, as well!

Another litter of teddies, plus
a couple of bunnies


These will be added to the others I have made, plus those made by Amy and Erica, and sent to Hand In Hand For Syria who will transport them to Syria for distribution to children in hospital there.


Free Motion Magic

I am not much good at doing free motion embroidery. Admittedly I have not done a lot of it but the little I have done has not turned out well.

I wanted to do some free motion embroidery on one of the panels that I am making on my Painterly Patches course so decided to have a go today. It had to be successful, there was no choice. I had virtually completed all the hand stitching on the panel and wasn’t prepared to start again. Then, I remembered – my magic free motion friend!

I am a sucker for giveaways on the internet. I just love ’em. And, occasionally, I am successful! Some time ago, probably about a year, I should think, I won a giveaway in the US. The prize consisted of a DVD about quilting, a Quilt Halo and the Supreme Slider (shown above). When it was delivered I had to pay almost £17.00 in tax and postal fees, but I knew the monetary value of the prize was well in excess of that amount. Today the Supreme Slider proved that it was well worth the money.

The Supreme Slider is a Teflon sheet that is placed on the needle bed of your sewing machine when doing free motion embroidery. It helps the fabric to move when you are stitching. The reverse of the sheet clings to the needle bed without any mess or fuss and can be easily removed when you have finished with it. There is a hole in the sheet for the needle to go through when stitching. (It is in the centre of the sheet which is a bit of a nuisance, but that is just a little niggle.) And the slider works like a dream!

I found it so much easier doing the freehand embroidery today. It is definitely my personal bit of free motion magic.

The Supreme Slider is not cheap – generally around £30 in UK online stores, but, in my opinion, it is well worth the money if you need to be able to control your freehand embroidery.

Here are a couple of links to online shops that I have found that sell the Supreme Slider:

www.barnyarns.co.uk

www.quiltdirect.co.uk

Felted Shoulder Bag

You may remember a previous post where I was complaining about the amount of green there is in the world. I REALLY don’t like green. I find it such a depressing colour. Which is why it was such a surprise to many people that I volunteered to knit and felt a bag for Alison at Cobwebs in Tottington. It just goes to show what a lovely, kind, generous person I am – cough, cough, splutter, splutter!

I had an idea of the type of bag that Alison was hoping for – shoulder bag, long strap, front flap and lots of room – so I began knitting. 

The ball band for the yarn states that it should be knitted on 6.5mm needles. Obviously the bag had to be worked on larger needles as it was due to be felted, which would shrink the bag creating a thick, stiff fabric. I began by using 10mm needles. This created a fabric  that had too little ‘body’. I was concerned that it was too loose and would not hold its shape when being felted in the washing machine. I then tried 8mm needles, which worked well. Having first tried 39 stitches on the 8mm needles, I pulled that back and increased the number of stitches to 49 which I cast on in brown. I worked on 49 stitches throughout the body of the bag and flap. I worked in moss stitch using only the brown wool for 34.5 cm (13.5 inches) to create the front of the main body of the bag, beneath the flap. This section of the bag was 48cm (19″) wide.

At that point I joined the green wool to work in both brown and green to create the back of the main body of the bag and the front flap. I continued working in moss stitch: 2 rows brown then 2 rows in green, slipping the second then every fourth stitch in one colour and the fourth and every following fourth stitch in the other colour. i did this so that the two colours merged into each other slightly as I did not want the bag to have a defined stripey effect. I was quite pleased with the result. This section of the bag was 48cm (15″) wide and 56cm (22″) long. I then reverted to knitting in only the brown wool to create a slightly wrinkled decorative edge to the flap. I decided on that to give extra design interest. The strip was 46cm (18″) wide over the 49 stitches and 6.5 cm (2.5″) deep.

The strap, which Alison had asked to be extra long, was, again, knitted in moss stitch over 10 stitches in the brown colourway. The overall measurement of the strap before felting was 240cm (91″) long by 9cm (3.75″). The green sides of the bag were knitted in one piece measuring 75cm (30″) by 9cm (3.75″).

I had decided to knit the bag in separate sections to allow me more control over the finished dimensions. I do not have much experience of felting in the washing machine and was too lacking in confidence to put a virtually finished bag into my machine. If I had a top-loading machine I would have had far more confidence in my ability to control the process as it can be interrupted throughout. To counter the problem of being unable to check progress, I use a low heat setting and a short to medium length wash when felting. If the item has not felted sufficiently I can put it back into the machine and choose an appropriate wash programme.

Apologies at this point as I forgot to measure the felted fabric before I constructed the bag (and after!).

The felted fabric was thick but comfortably pliable. The yarn had a much softer feel than it had when I was knitting with it. It is a rough textured yarn even though it contains 10% Angora – someone has said to me that it feels as though it has half the hedge in it! Once it had been felted the texture of the angora became more apparent, making the fabric unexpectedly soft to the touch.

To construct the bag I had to trim the edges of the fabric to neaten it and to ensure I could achieve the design effect I was after. To protect the edges of the bag and strap, I decided to oversew all of them by hand. A mammoth task which took very many hours! The fabric was too thick and too fluffy for me to even consider attempting to use my sewing machine for the job.


The lining was 100% cotton, brown with a slightly oriental tree pattern in two shades of green. I had bought two Fat Quarters and needed to cut into both to ensure a good fit. Again this was sewn in entirely by hand, as was the label proclaiming the bag was handmade.

I expended a lot of mental energy deciding how best to create the closure method for the bag. I had found large brown buttons in my collection which were an ideal way to embellish it. My problem was that I did not want to use felt in the closure as it would be too thick and give a heavy appearance. I decided upon ribbon loops on the underside of the flap which would be put around the buttons to keep the bag closed. Again, suitable ribbon was found in my stash.

I did not attach the second end of the strap until I had measured it on Alison. I wanted to ensure that the strap was exactly the right length. Hmmm. Problem. I didn’t want her to see the bag until it was complete. My solution was to make her try it on in the kitchen at the shop, with her eyes closed! (It was at the start of our knitting group session in Cobwebs.) She was then banned from entering the shop unless her eyes were closed, until I had affixed the strap.

Finally… the reveal. Alison was delighted with her bag and proudly showed it to members of the group. I was quite pleased with it, as well, and tried hard not to be as proud as a peacock. My overwhelming feeling was that I was pleased with myself as it was I who had designed the bag. Woohoo! I had, in my opinion, been ‘creative’. R-E-S-U-L-T!


I used four balls of Debbie Bliss Donegal Luxury Tweed Chunky which was 90% wool and 10% angora (for some reason the webpage for this yarn says it is 100% wool) in brown and four balls in green. However, Only a little of the fourth brown and second green balls was used.


At last…

At last! Some good news!

You may remember that I had to cancel my holiday to Turkey in November because of my mother’s ill health. Well, today, just four days short of six months to the day after the due departure date, I have finally been told by the travel insurance company that they will pay me! 

This is particularly good news as the repair to my sewing machine has cost me £145.00 today! I have told the machine that it now owes me many years of trouble-free stitching. It had better have been listening to me!

I hope you have all had something good happen today.

Repair or Replace?

Last week my lovely Brother Super Ace II sewing machine decided to play me up. It is a computerised machine which has lots of lovely stitches to choose from. Each stitch is numbered and to select the one you would like to use you simply tap in the two digits of its number – easy peasy. Except that last week it ceased to be easy as the buttons for numbers ‘1’ and ‘2’ both stopped working – on the same day! Luckily the machine was still stitching but I wasn’t able to select any stitches that included either a ‘1’ or a ‘2’ – in other words, most of the main utility stitches! Grrr.

So… should I have the machine repaired, or “bite the bullet” and buy a new machine? Although the machine is well over a decade old, it had rarely been used before I owned it and certainly shouldn’t be worn out, but, would putting new parts on an old machine cause more problems than it solved? Then there was the matter of the cost of repair. I was told by someone at the repair shop that the cost should be in the region of £80 – and I knew that I would need to have it serviced, as well. On the other hand, if I decided to replace the machine it would make sense to upgrade at the same time which would mean that a new machine was likely to cost somewhere in the region of £800 to £1000. Quite honestly I did not want to spend that sort of amount at the moment. At times like these a crystal ball would be very handy!

I decided to have the machine repaired as I reasoned that it had not sewn a huge number of miles, considering its age. So now, I am patiently awaiting its return from the repair shop. I have certainly missed it, but I did try use it a lot before it went to sewing hospital.

One or two people have suggested that I should go ahead and buy a new machine and keep my Super Ace II as a back up. I am unlikely to do so as I do not want two sewing machines – and there certainly isn’t enough room in the house for another machine. I know that some people like to own several or, even, a lot of sewing machines, but I am not one of them. All I want is my lovely Brother back, working like a dream – please.